AssetBook User Guide
Introduction
Welcome logistics managers! If you are someone who
Manages logistics and inventory in a professional capacity
Is a fast typist, tired of shuffling back and forth between a mouse and keyboard
Is feeling swamped by the tedium of contact management on traditional office software
Rejoice because AssetBook is here!
AssetBook helps to streamline the task of tracking contacts and the logistical assets they are in charge of, making your management tasks smoother than ever.
AssetBook is a contact management application designed to:
Digitally Organize your Contacts:
Say goodbye to scattered contacts. Have them all organized and easily accessible in one place.Effortlessly Track all your Assets:
Keep tabs on who is responsible for every piece of equipment and item in your inventory.Maximize your Operational Efficiency:
Our application, combined with your swift keyboard skills, turns the chore of contact management into a seamless and satisfying process with convenient commands and shortcuts.
Using this Guide
This user guide is meant to provide guidance for using AssetBook and comprehensively document its features. You can click on blue-colored texts such as this link to the table of contents to jump to the referenced section immediately.
A glossary is provided in case you encounter any unfamiliar terms.
Look out for texts with icons similar to this, which would contain additional information, tips, or warnings.
New Users
If this your first time using AssetBook, head over to quick start to learn how to set up the application and get started. After which, you may take a look at the features of AssetBook, or simply follow this guide in order.
Don't worry if you don't have much technical know-how! We will guide you through step-by-step.
Experienced Users
If you are not a new user and are just looking to refresh your memory, you can utilize the table of contents or skip to the command summary.
Table of Contents
- Introduction
- Using this Guide
- Table of Contents
- Quick Start
- Features
- Frequently Asked Questions
- Known Issues and Future Features
- Command Summary
- Glossary
Quick Start
Setting Up
The following instructions are for Windows, MacOS and Linux.
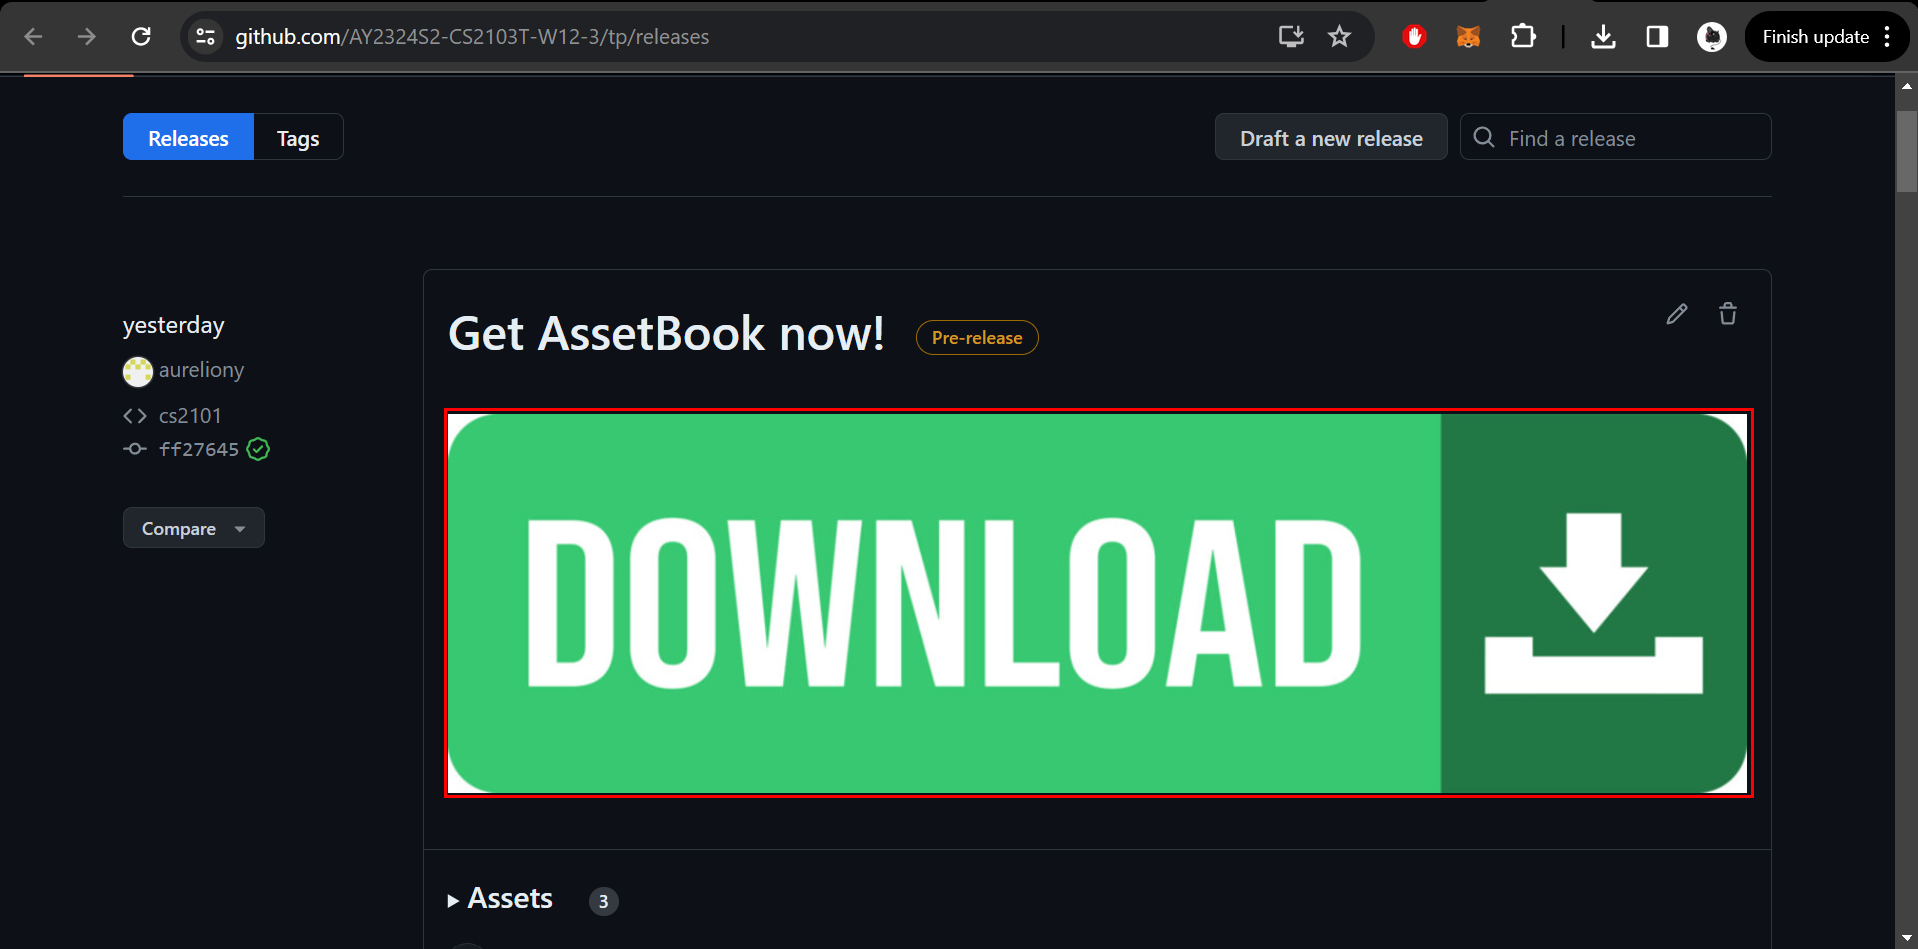
- Move
assetbook.jarinto the folder where you want AssetBook to store the contact information. New users may simply create a folder on their desktop, then drag and dropassetbook.jarinside.
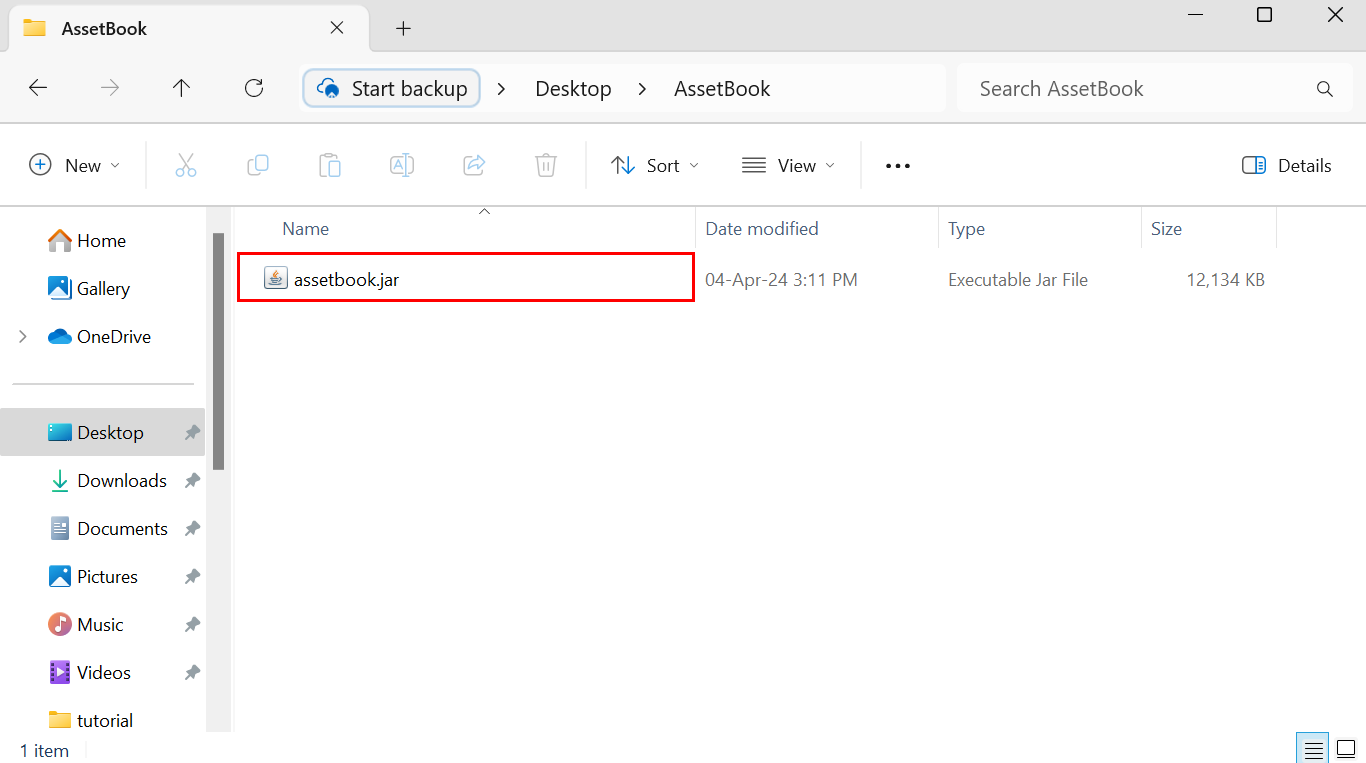
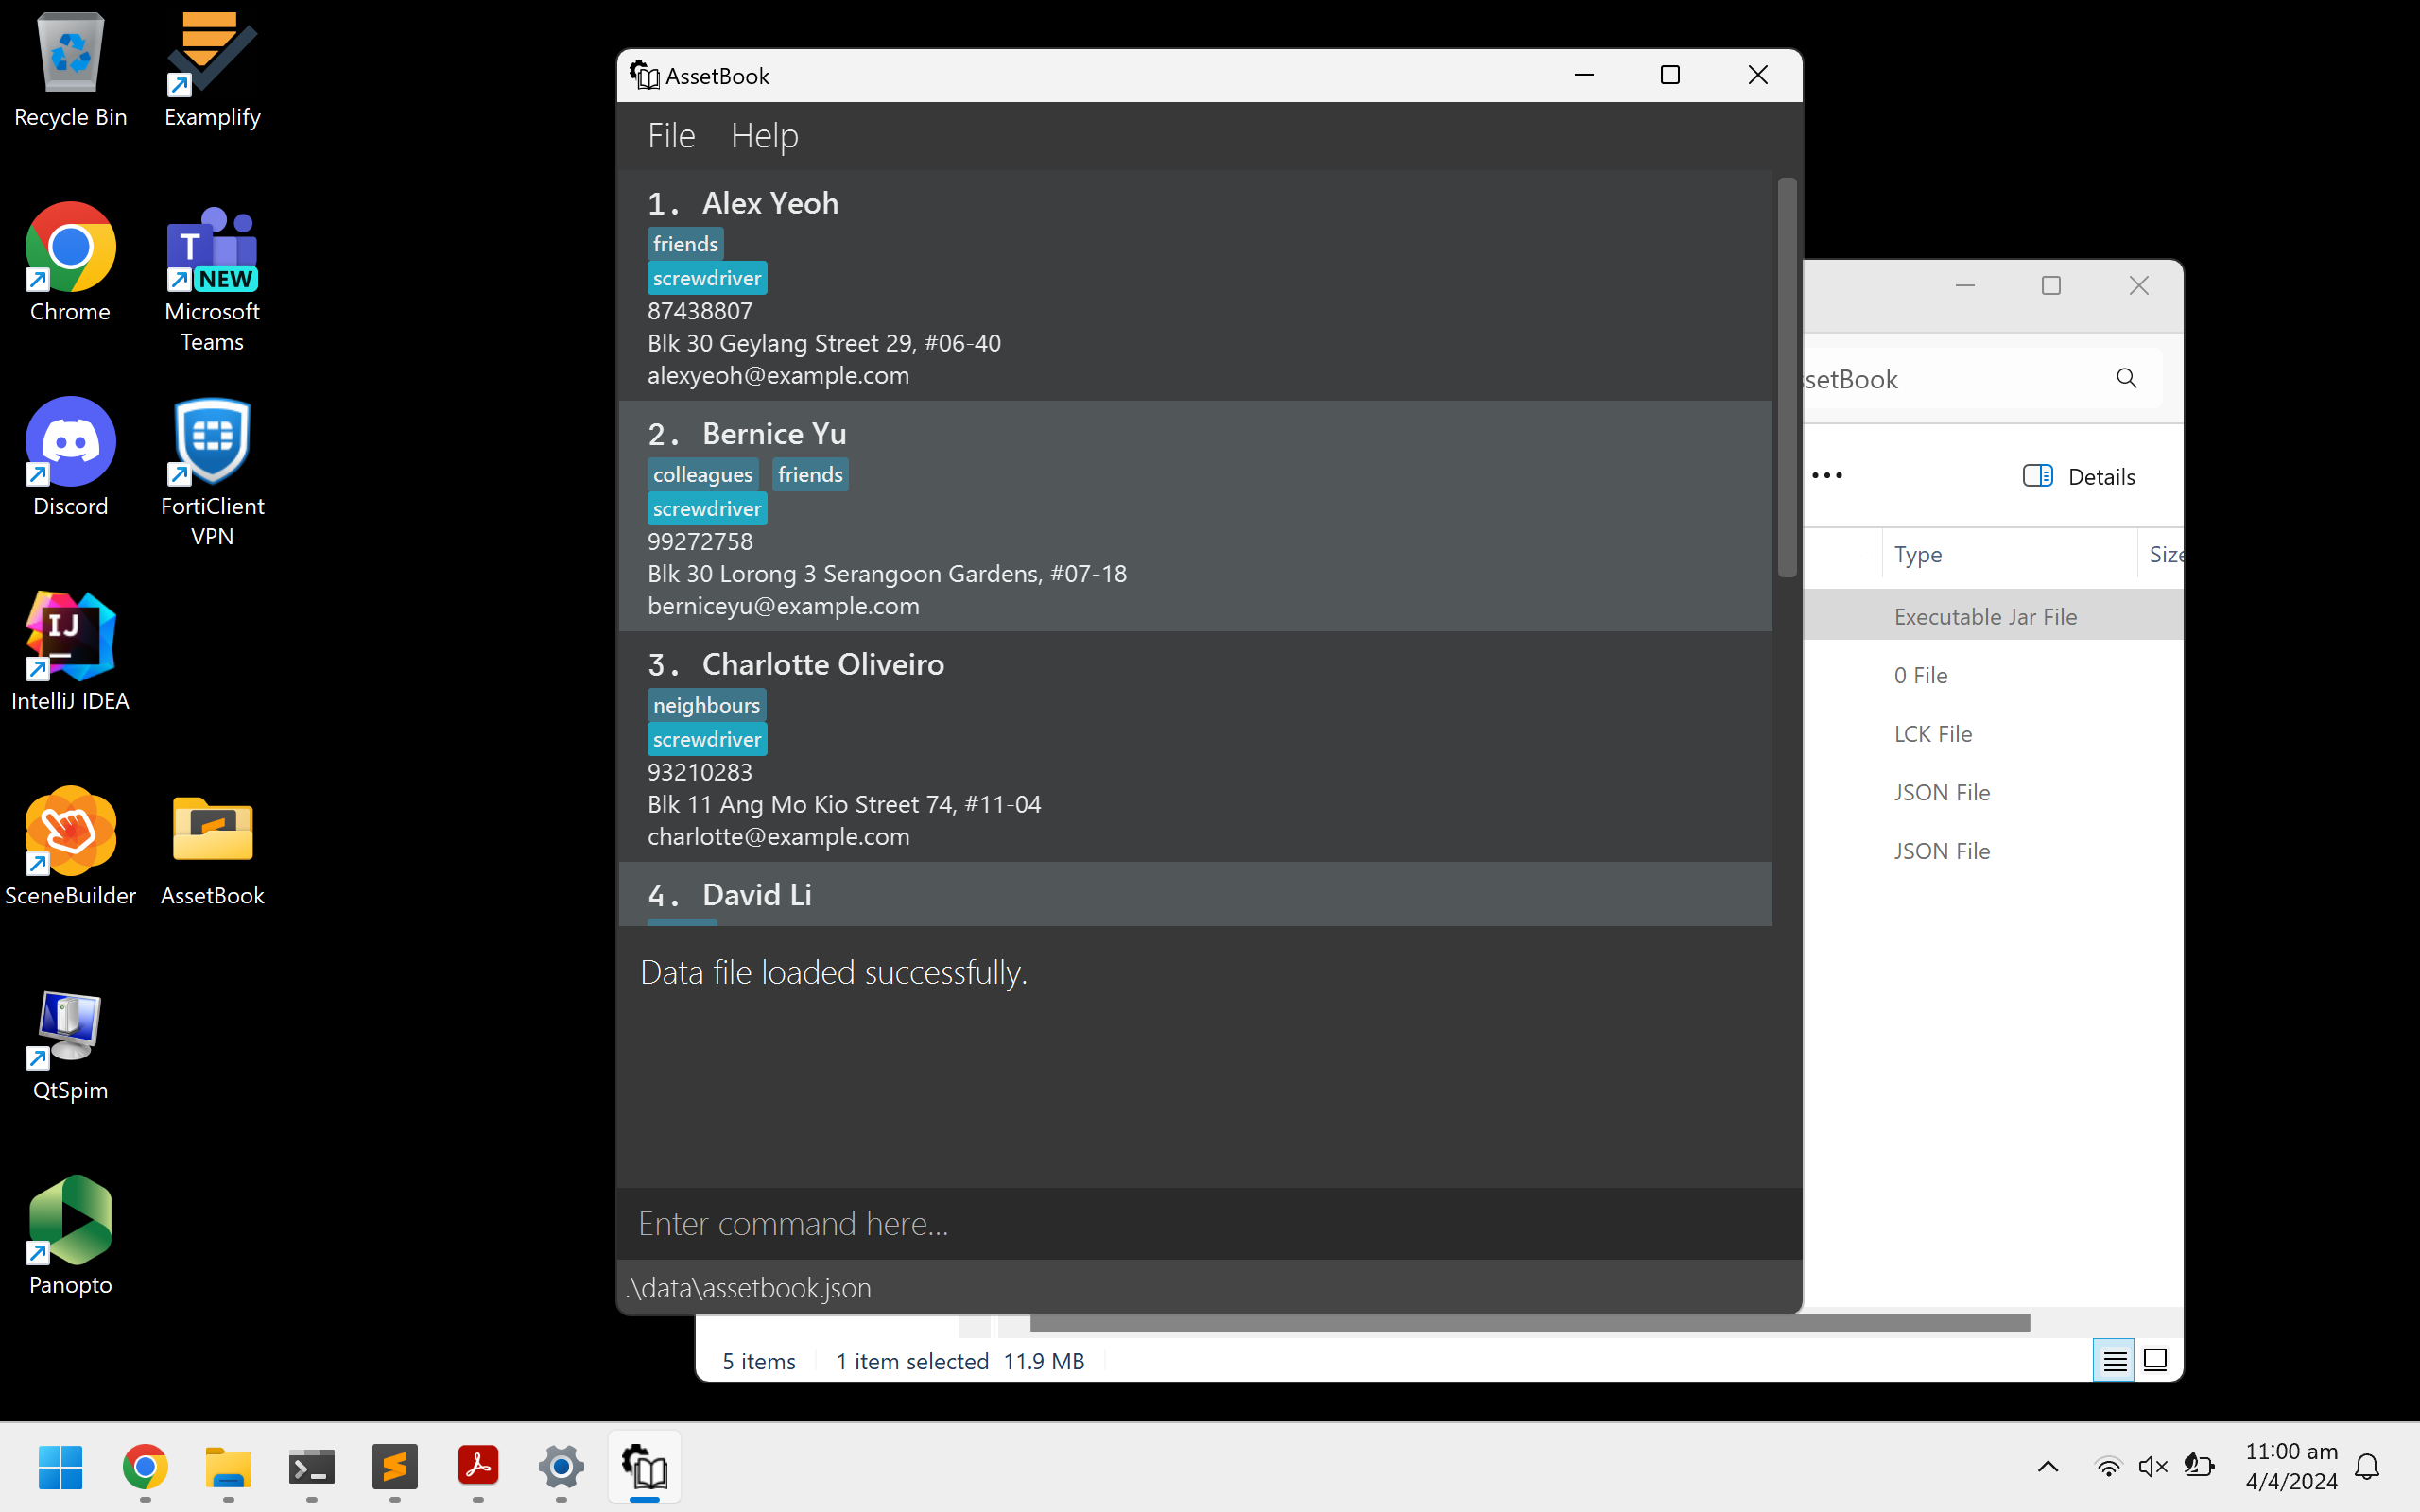
- To launch the application, double-click on
assetbook.jarand a GUI similar to the one below should appear. Note that the application contains some sample data when launched for the first time.
Having trouble? You may find the FAQ useful.
Navigating the GUI
Here are the components of the GUI.
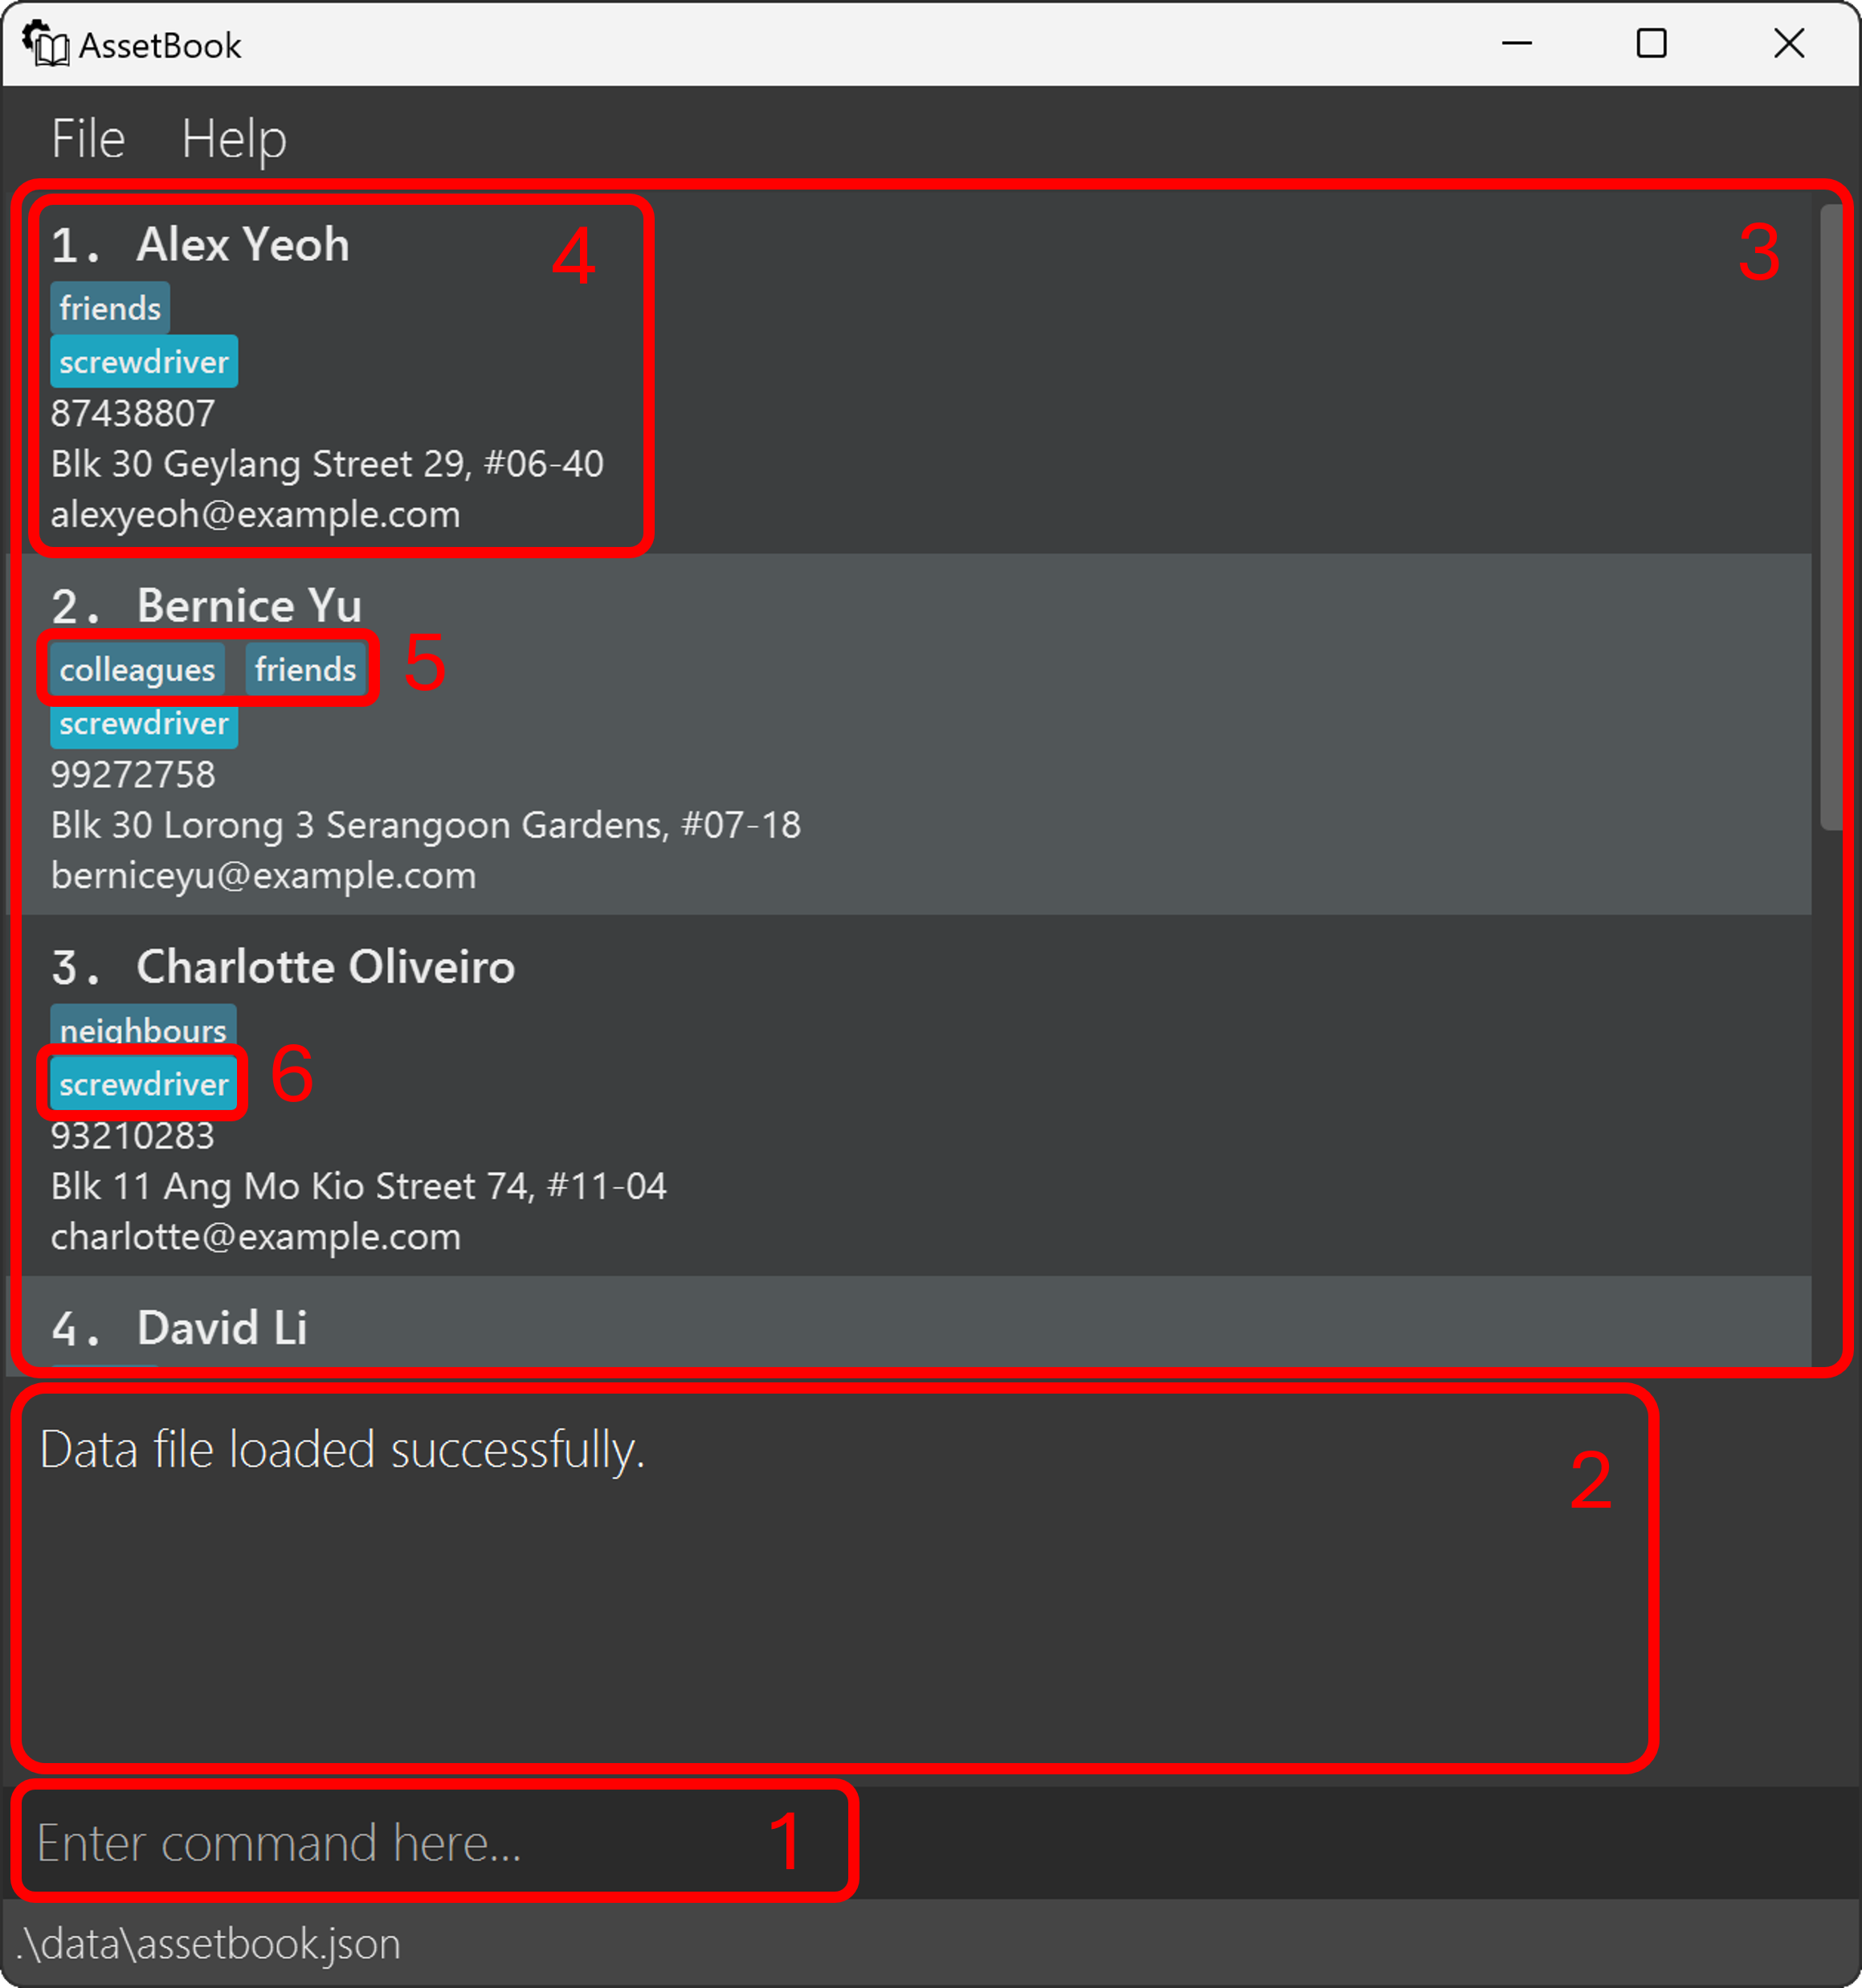
- Command Input Box
- Command Output Box
- Contacts List
- Contact Details
- Tags
- Assets
You can resize the command output box by dragging its top edge.
Tutorials
This section provides a walkthrough of common tasks performed in AssetBook.
Here we show you how to add a contact with an associated asset, search for your added contact, and edit it. All commands are performed by typing specific texts into the command input box. For detailed information on all available features, please refer to the features section.
Adding Your First Contact
Let's get started by adding our first contact, John Doe, into AssetBook.
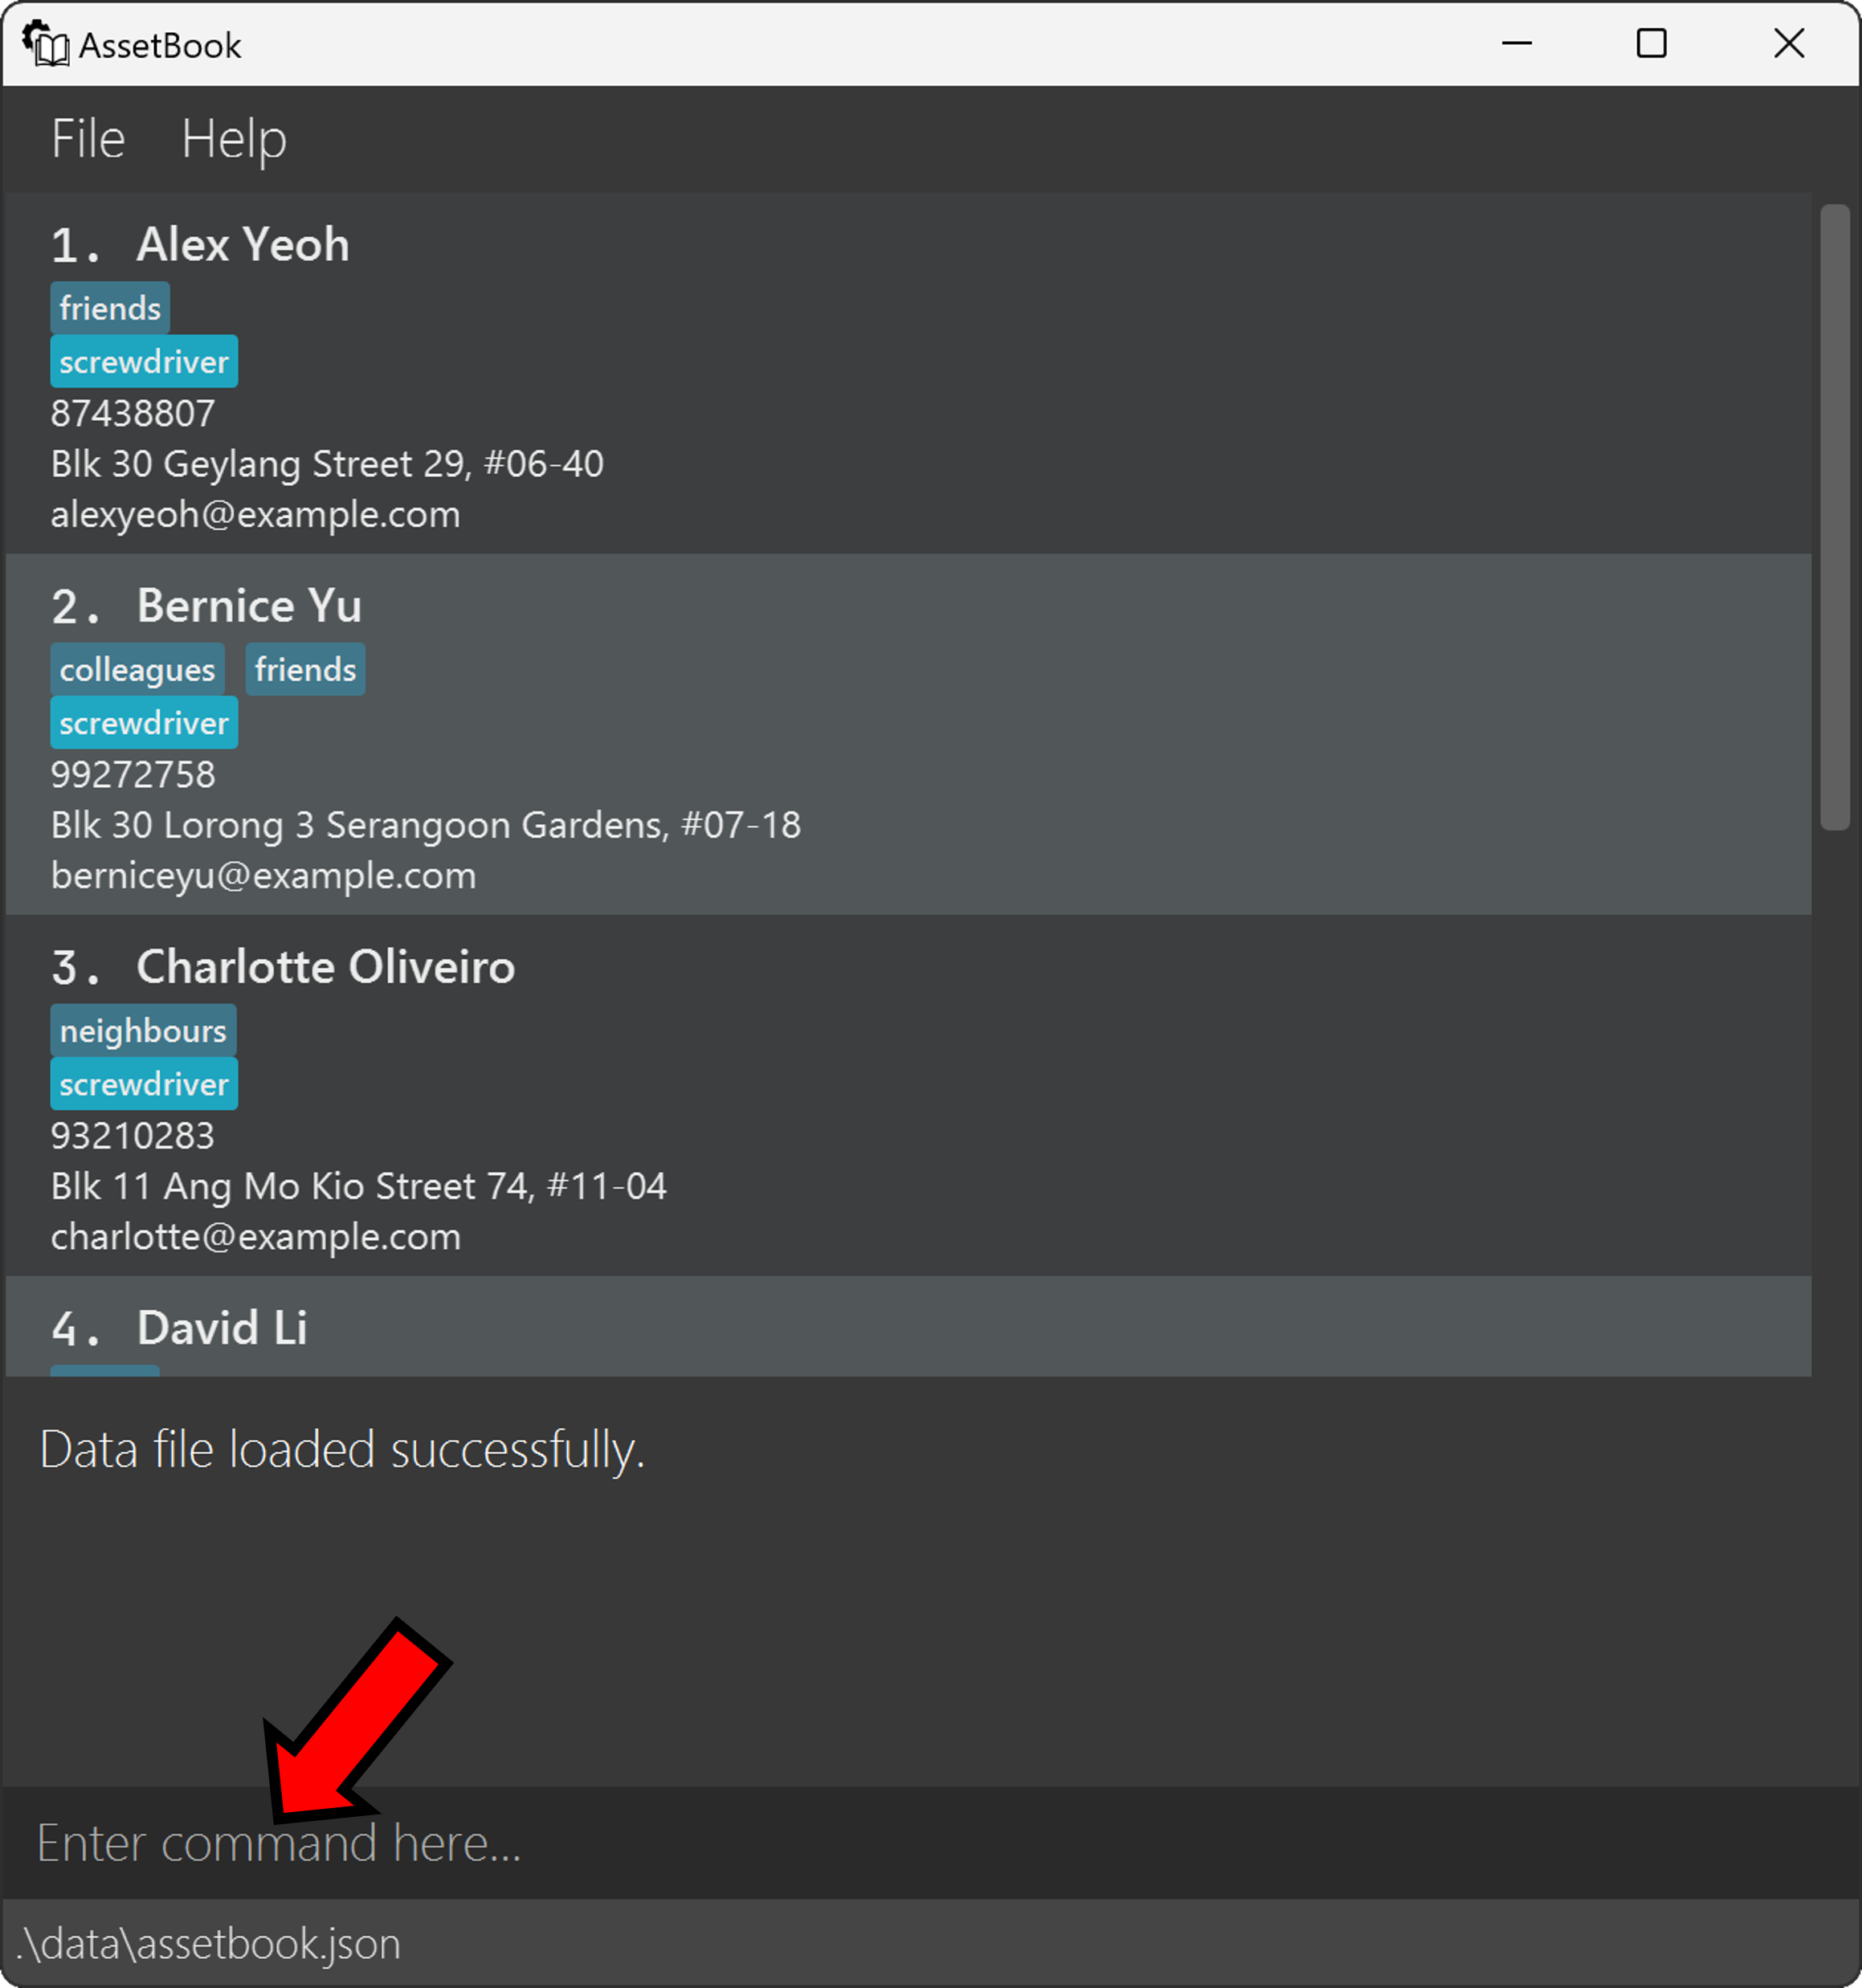
- Click on the Command Input Box: Begin by locating and clicking on the command input box near the bottom of the application.
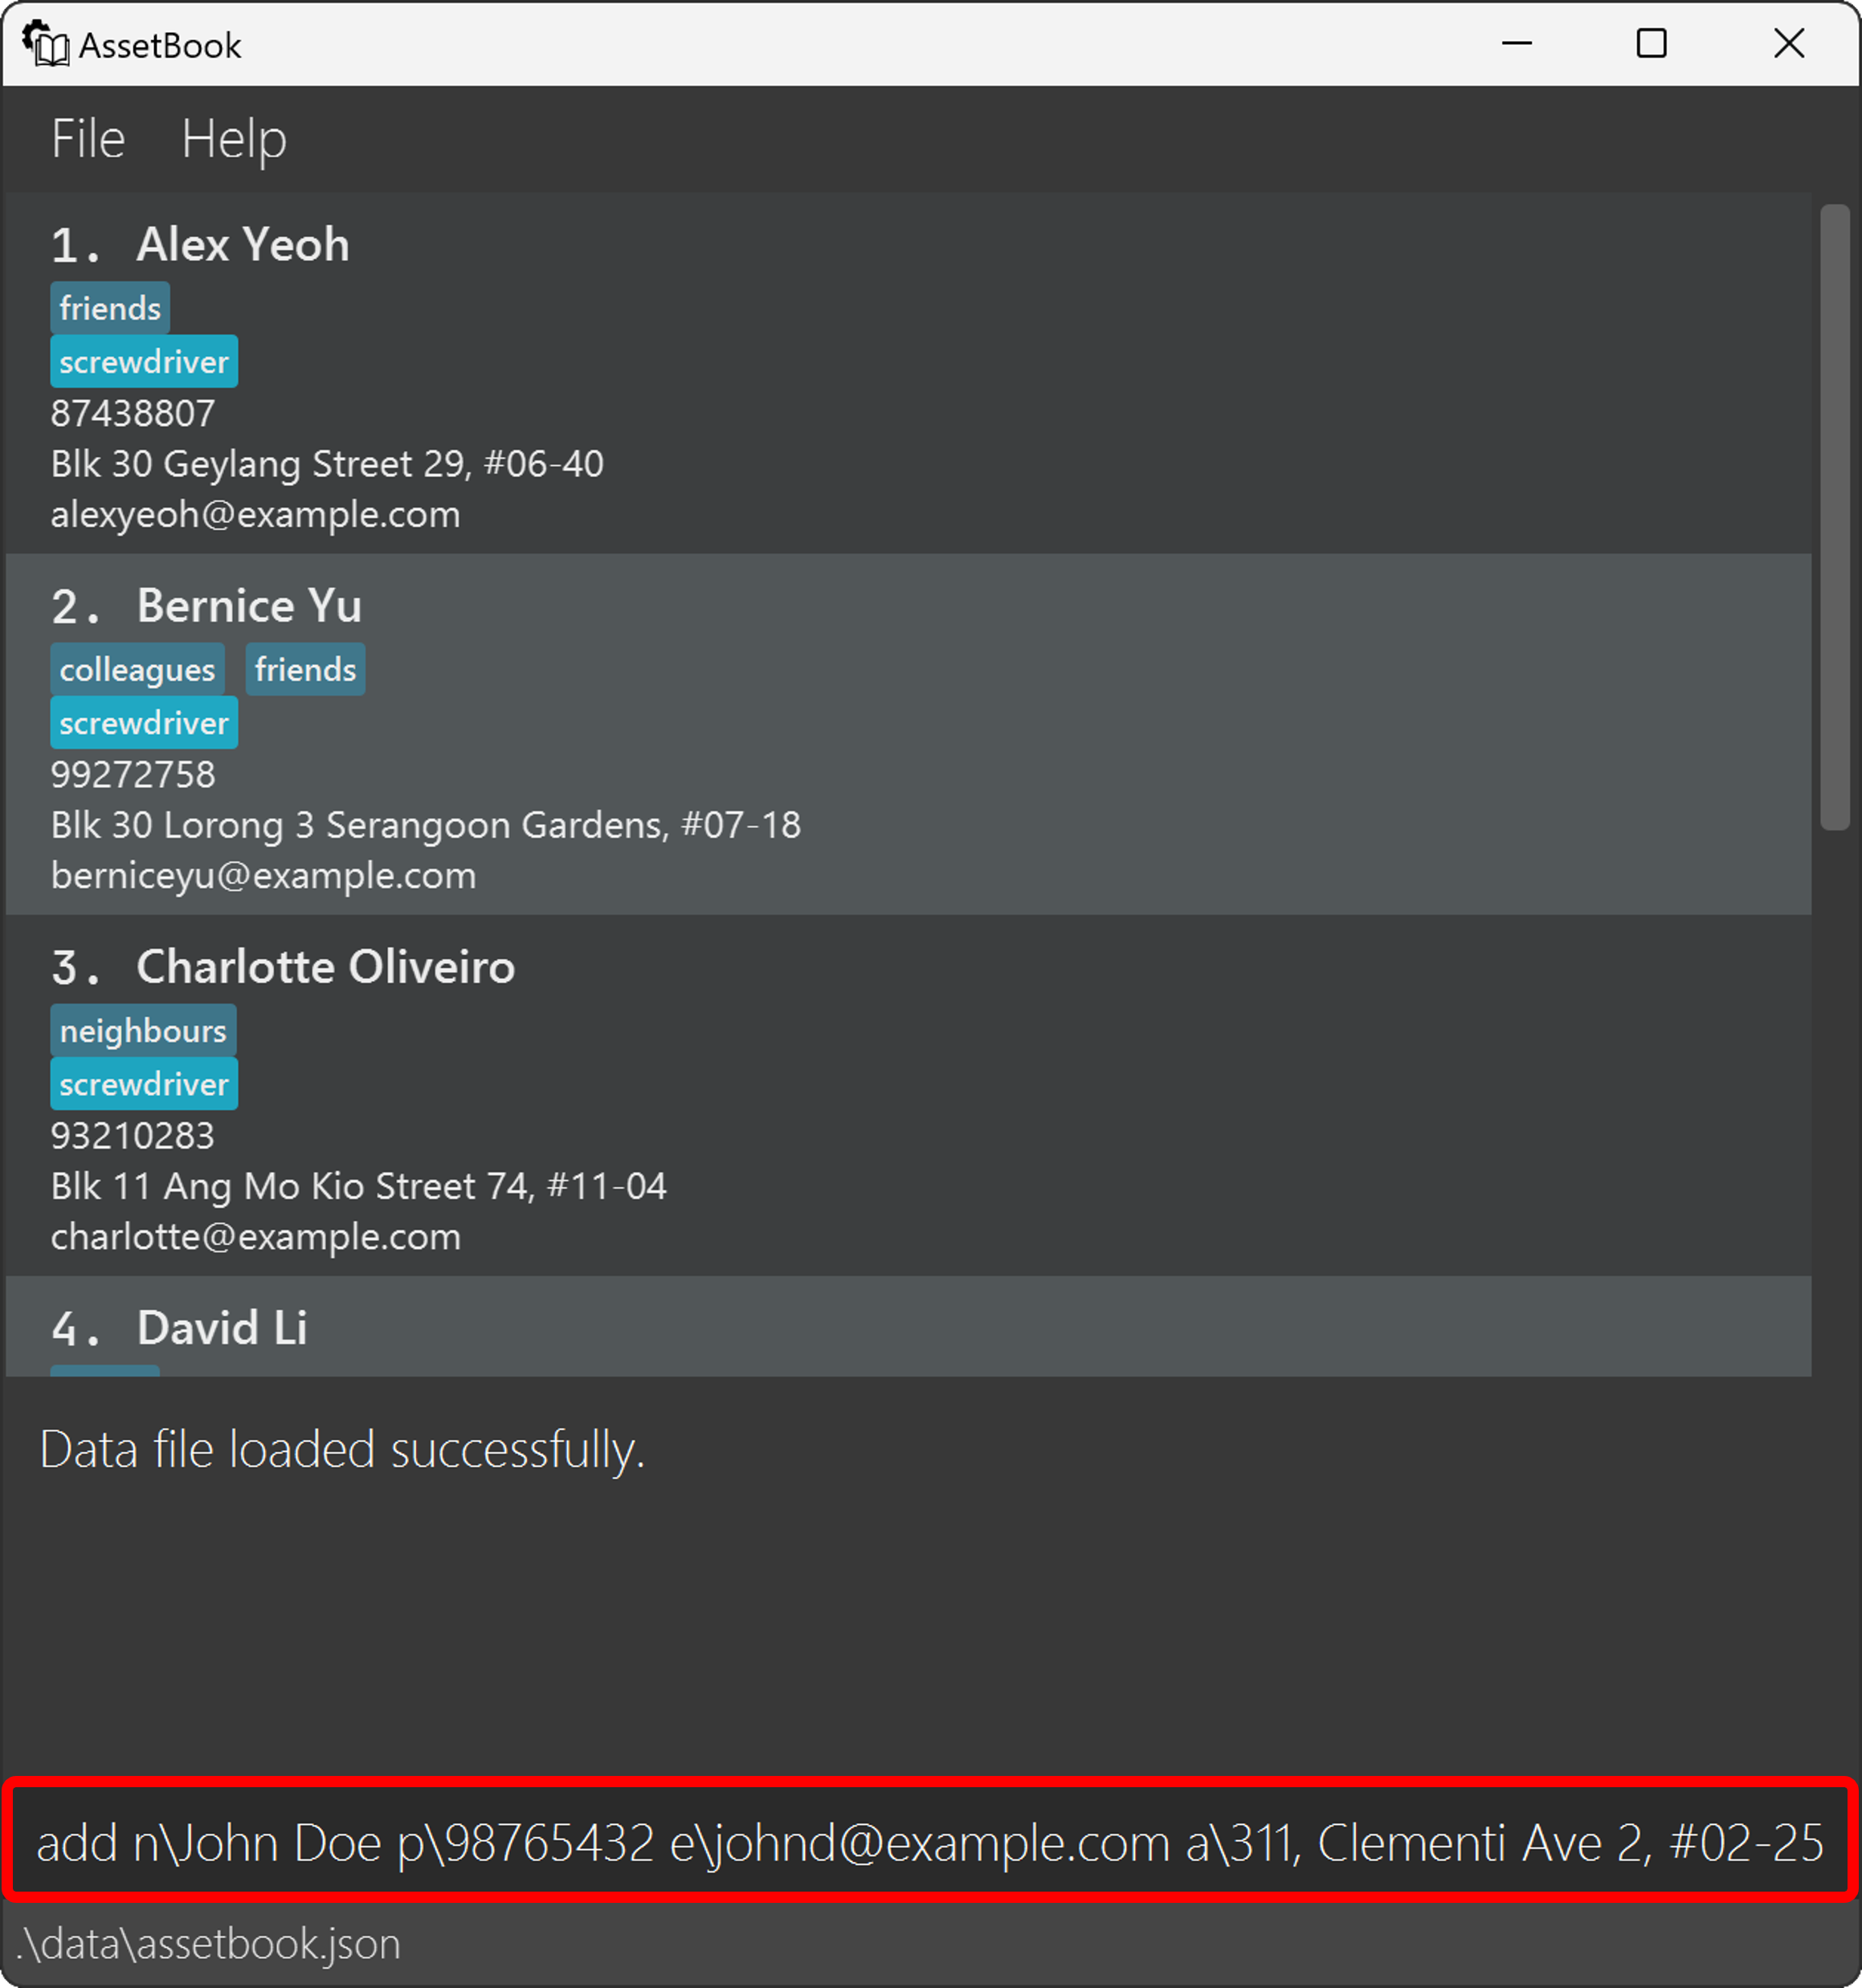
- Adding Our First Contact:
Let's add your first contact, John, by copying the following command into the command input box:
add n\John Doe p\98765432 e\johnd@example.com a\311, Clementi Ave 2, #02-25 t\friends t\owesMoney A\screwdriver
- Execute the Command:
After typing the command, simply press
Enterto add the contact into AssetBook.
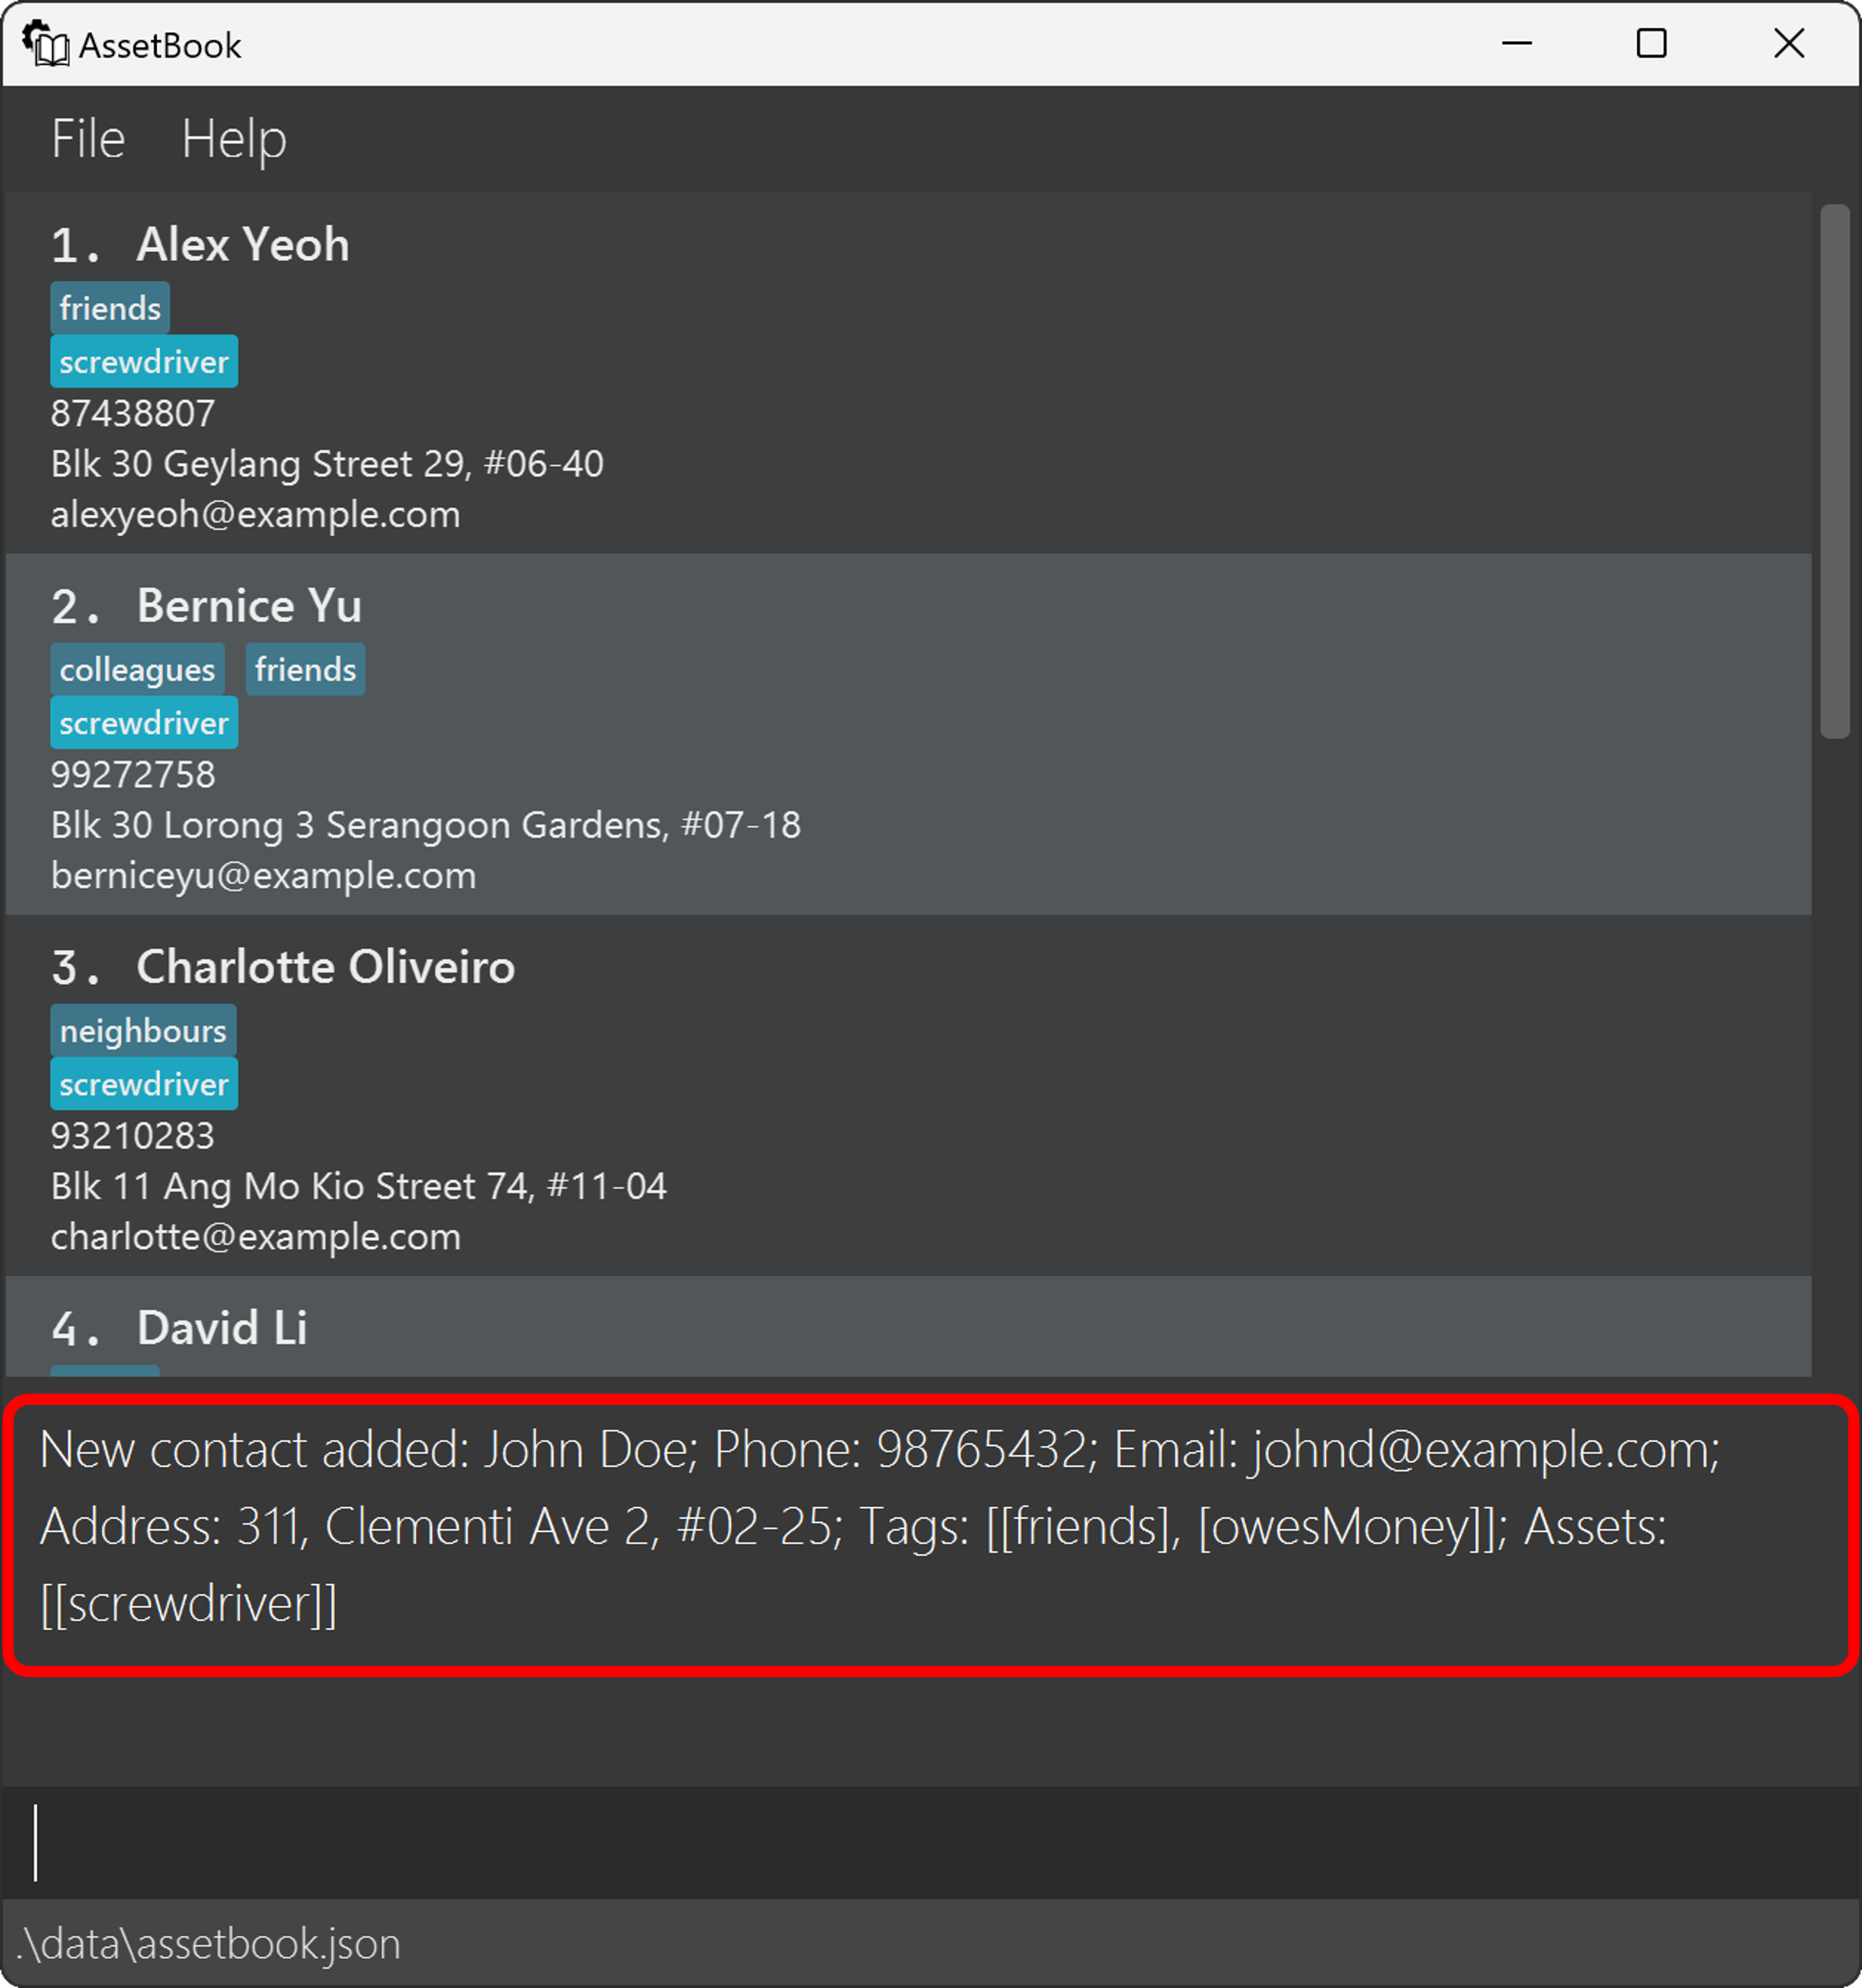
- Confirmation: Check for a confirmation message to verify that John Doe has been added successfully.
Searching for Contacts
Now that you've successfully added John Doe to AssetBook, let's try to find his contact.
Click the Command Input Box: First, click on the command input box of AssetBook. This is where you'll enter the find command.
Enter the Find Command: Let's now find the contact, John, we just added by entering the following command:
find John
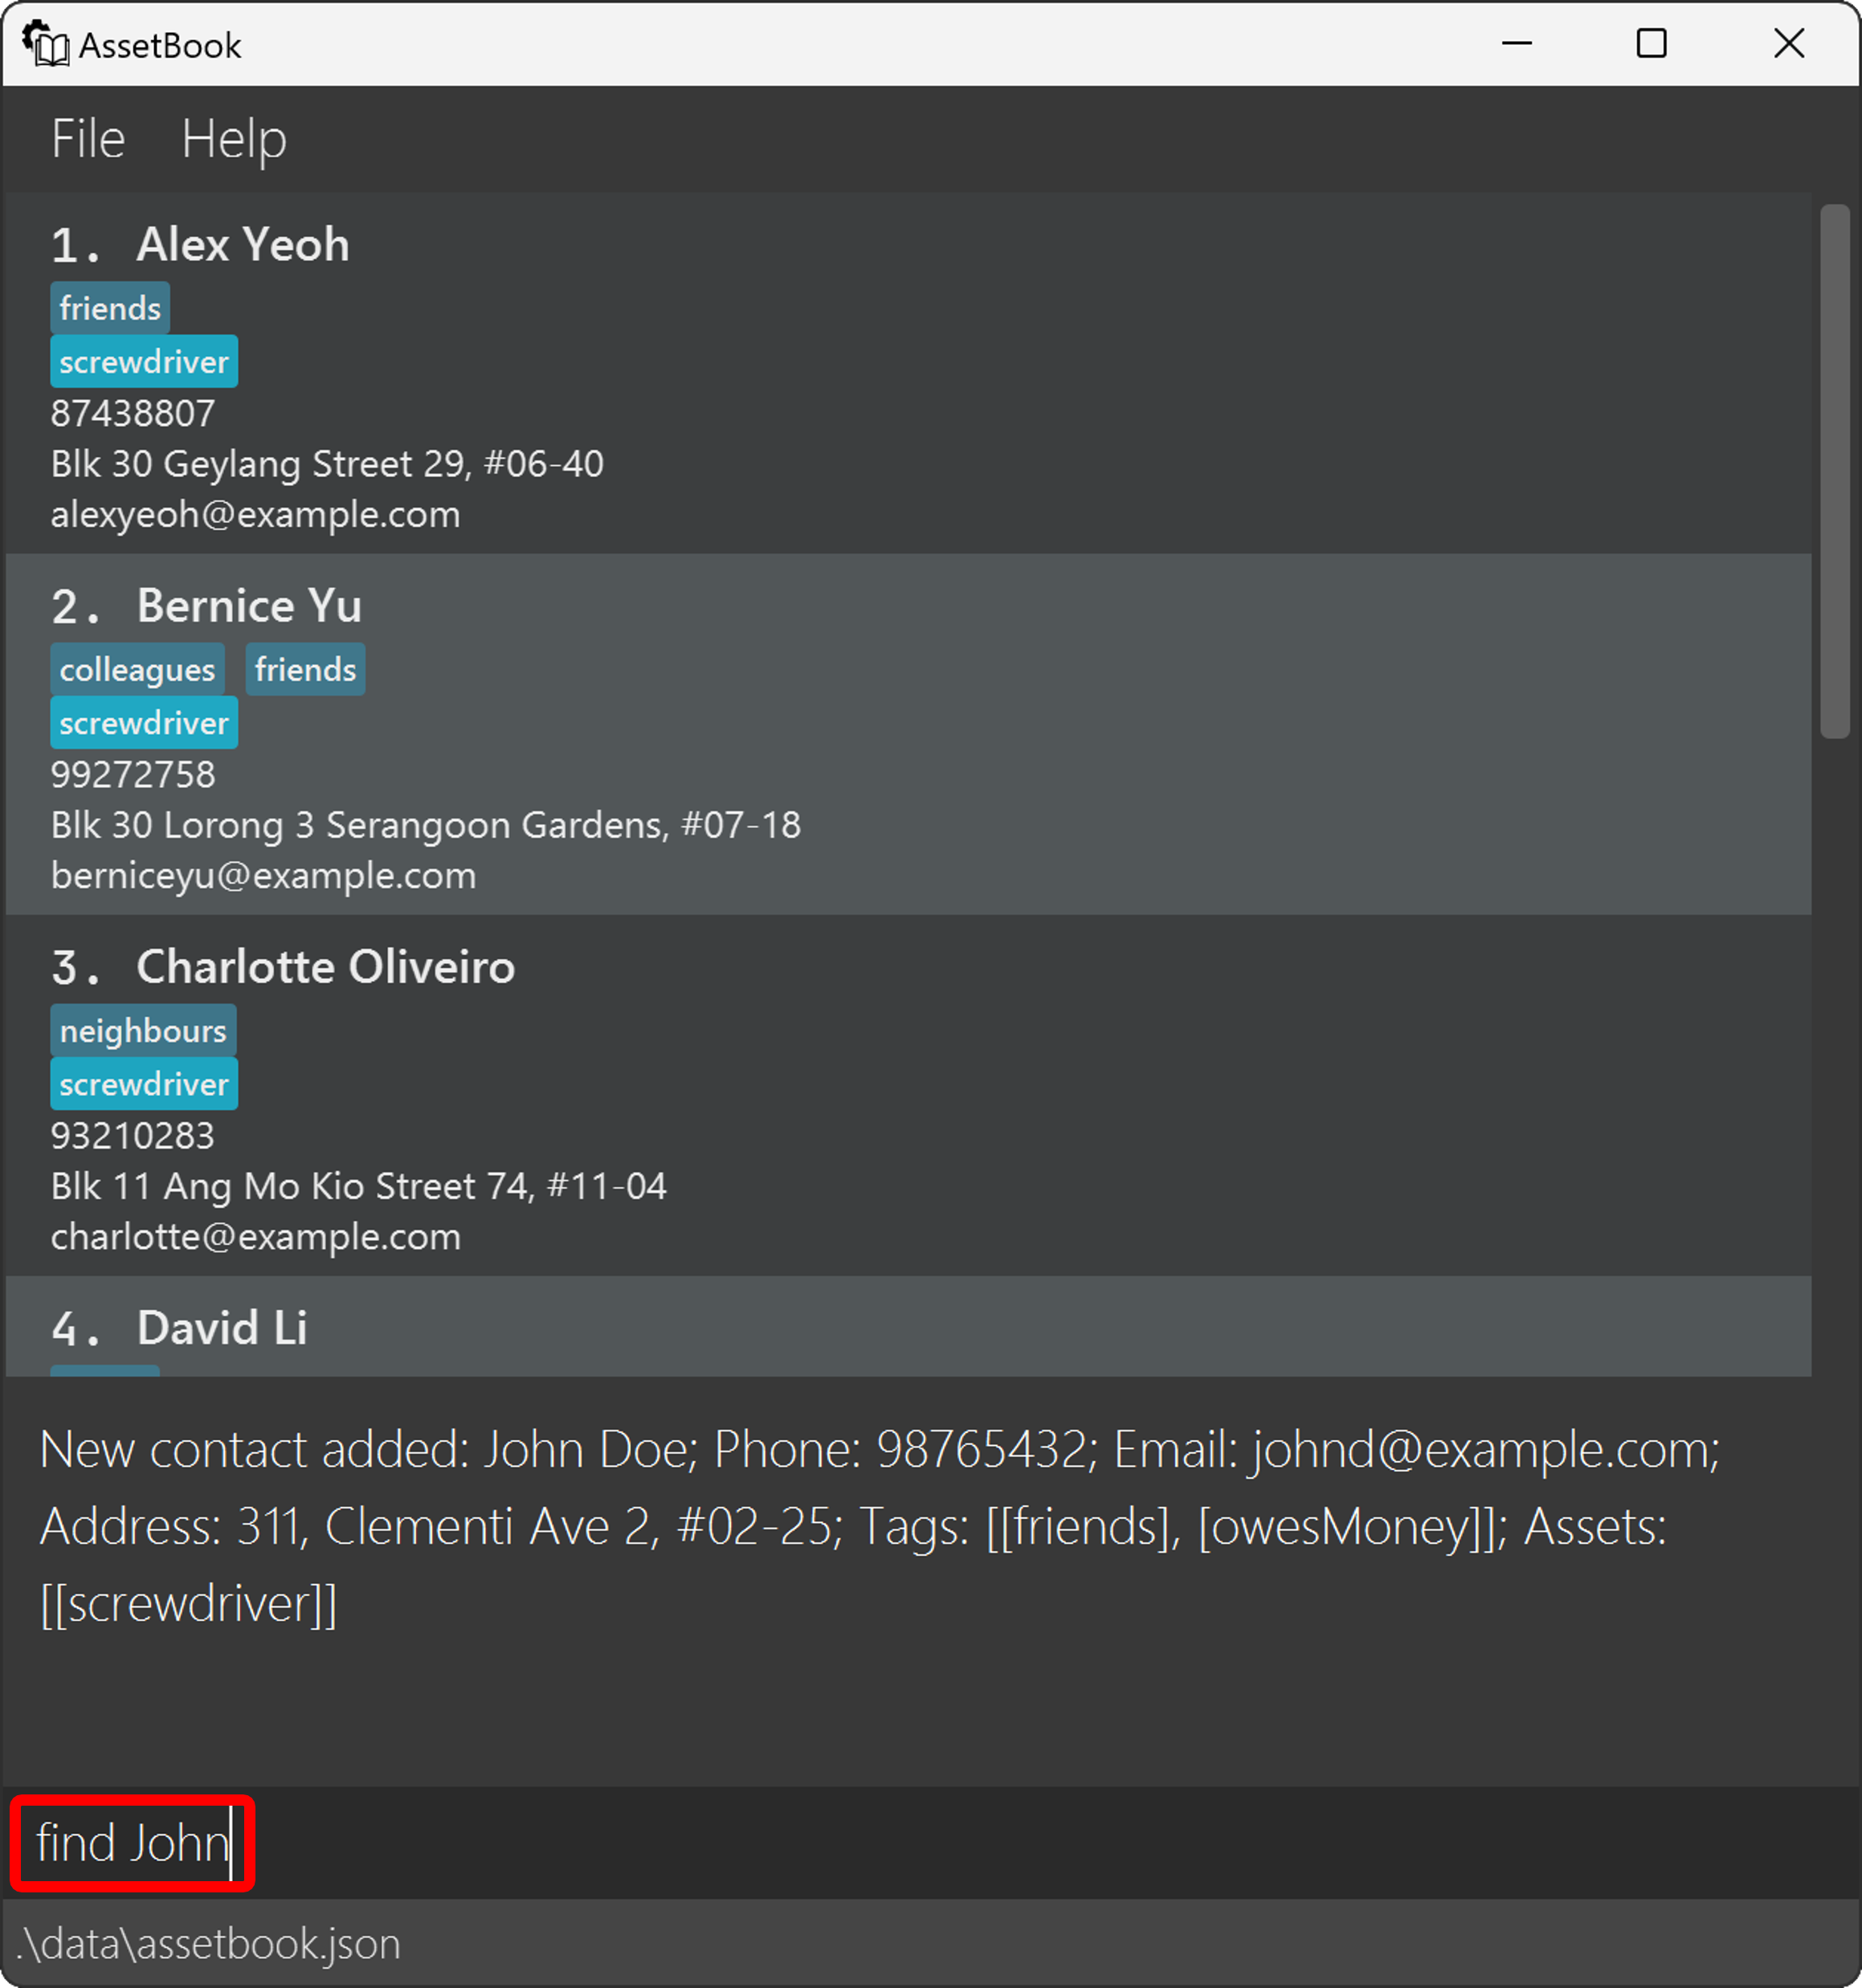
- Execute the Command:
After typing the command, simply press
Enterto find the contact in AssetBook.
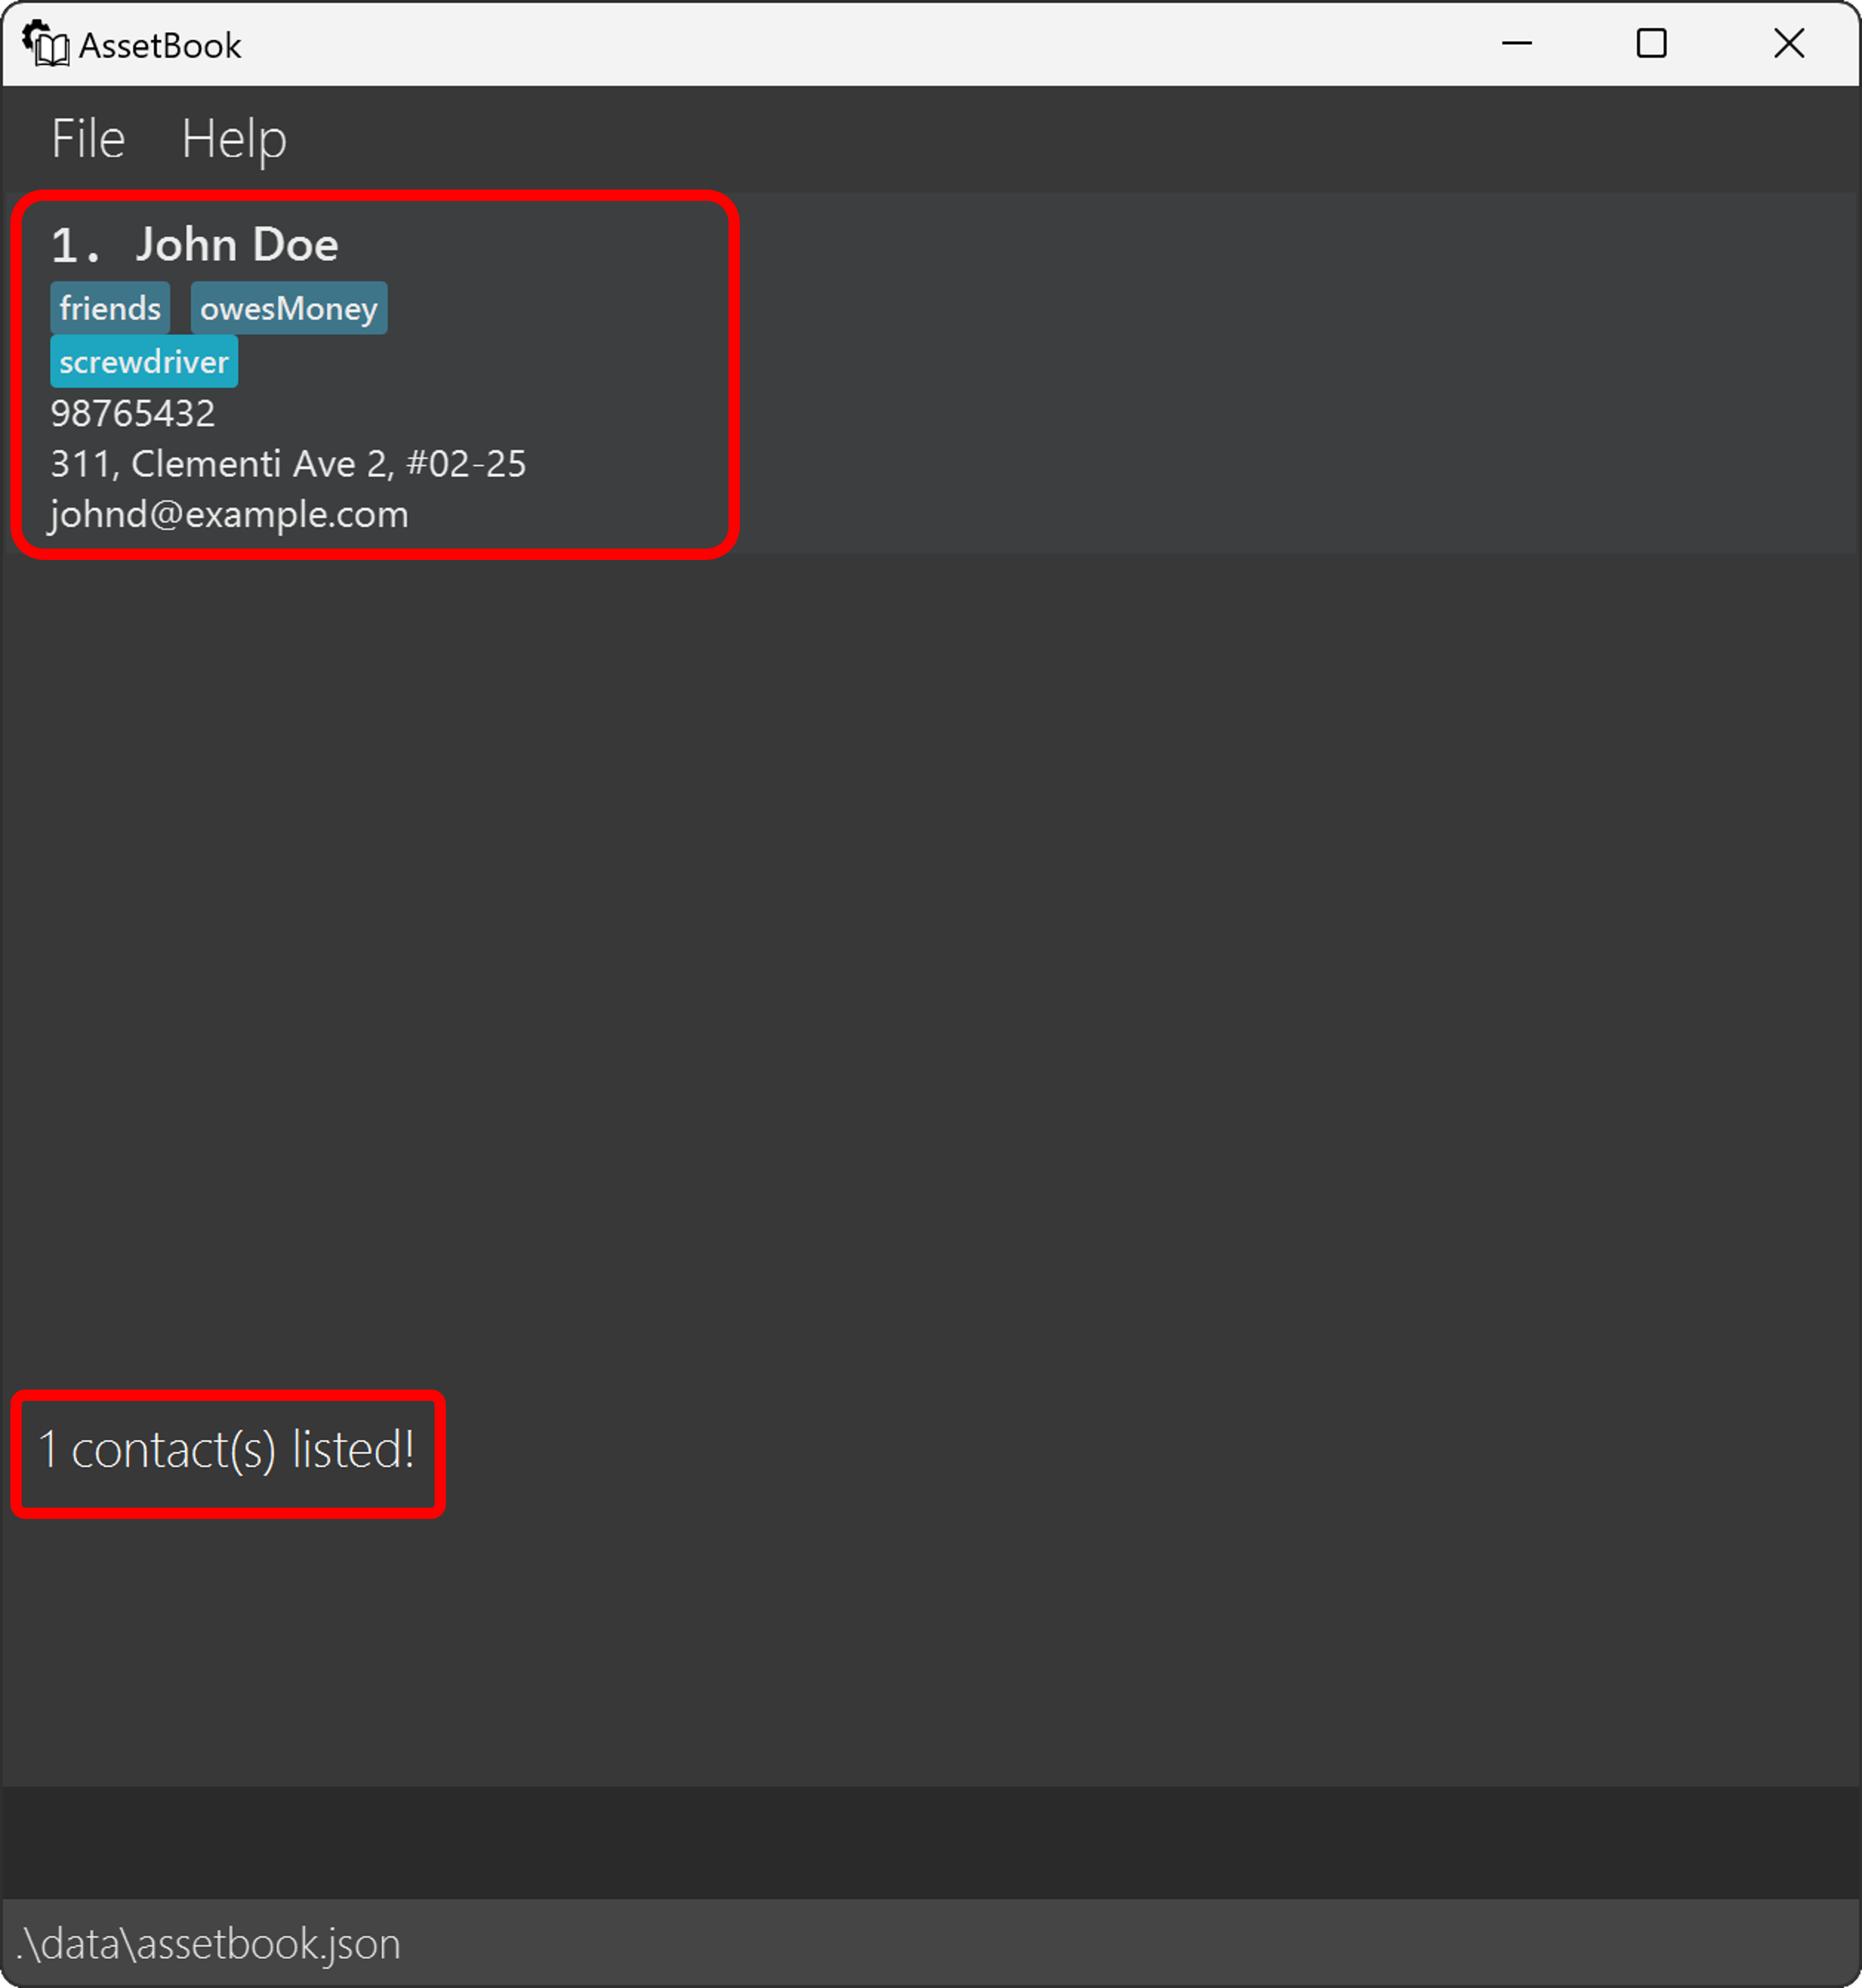
- View the Results: John Doe will be displayed in the contacts list, along with the total number of contacts matching 'John' found.
Editing your Contact
Let's update John's email address.
Click on the Command Input Box: Begin by locating and clicking on the command input box.
Find out John's Index: We can find out what John's index is by checking the number currently beside his name. The
findcommand makes it easier by reducing the number of contacts displayed. Here, he has index 1.
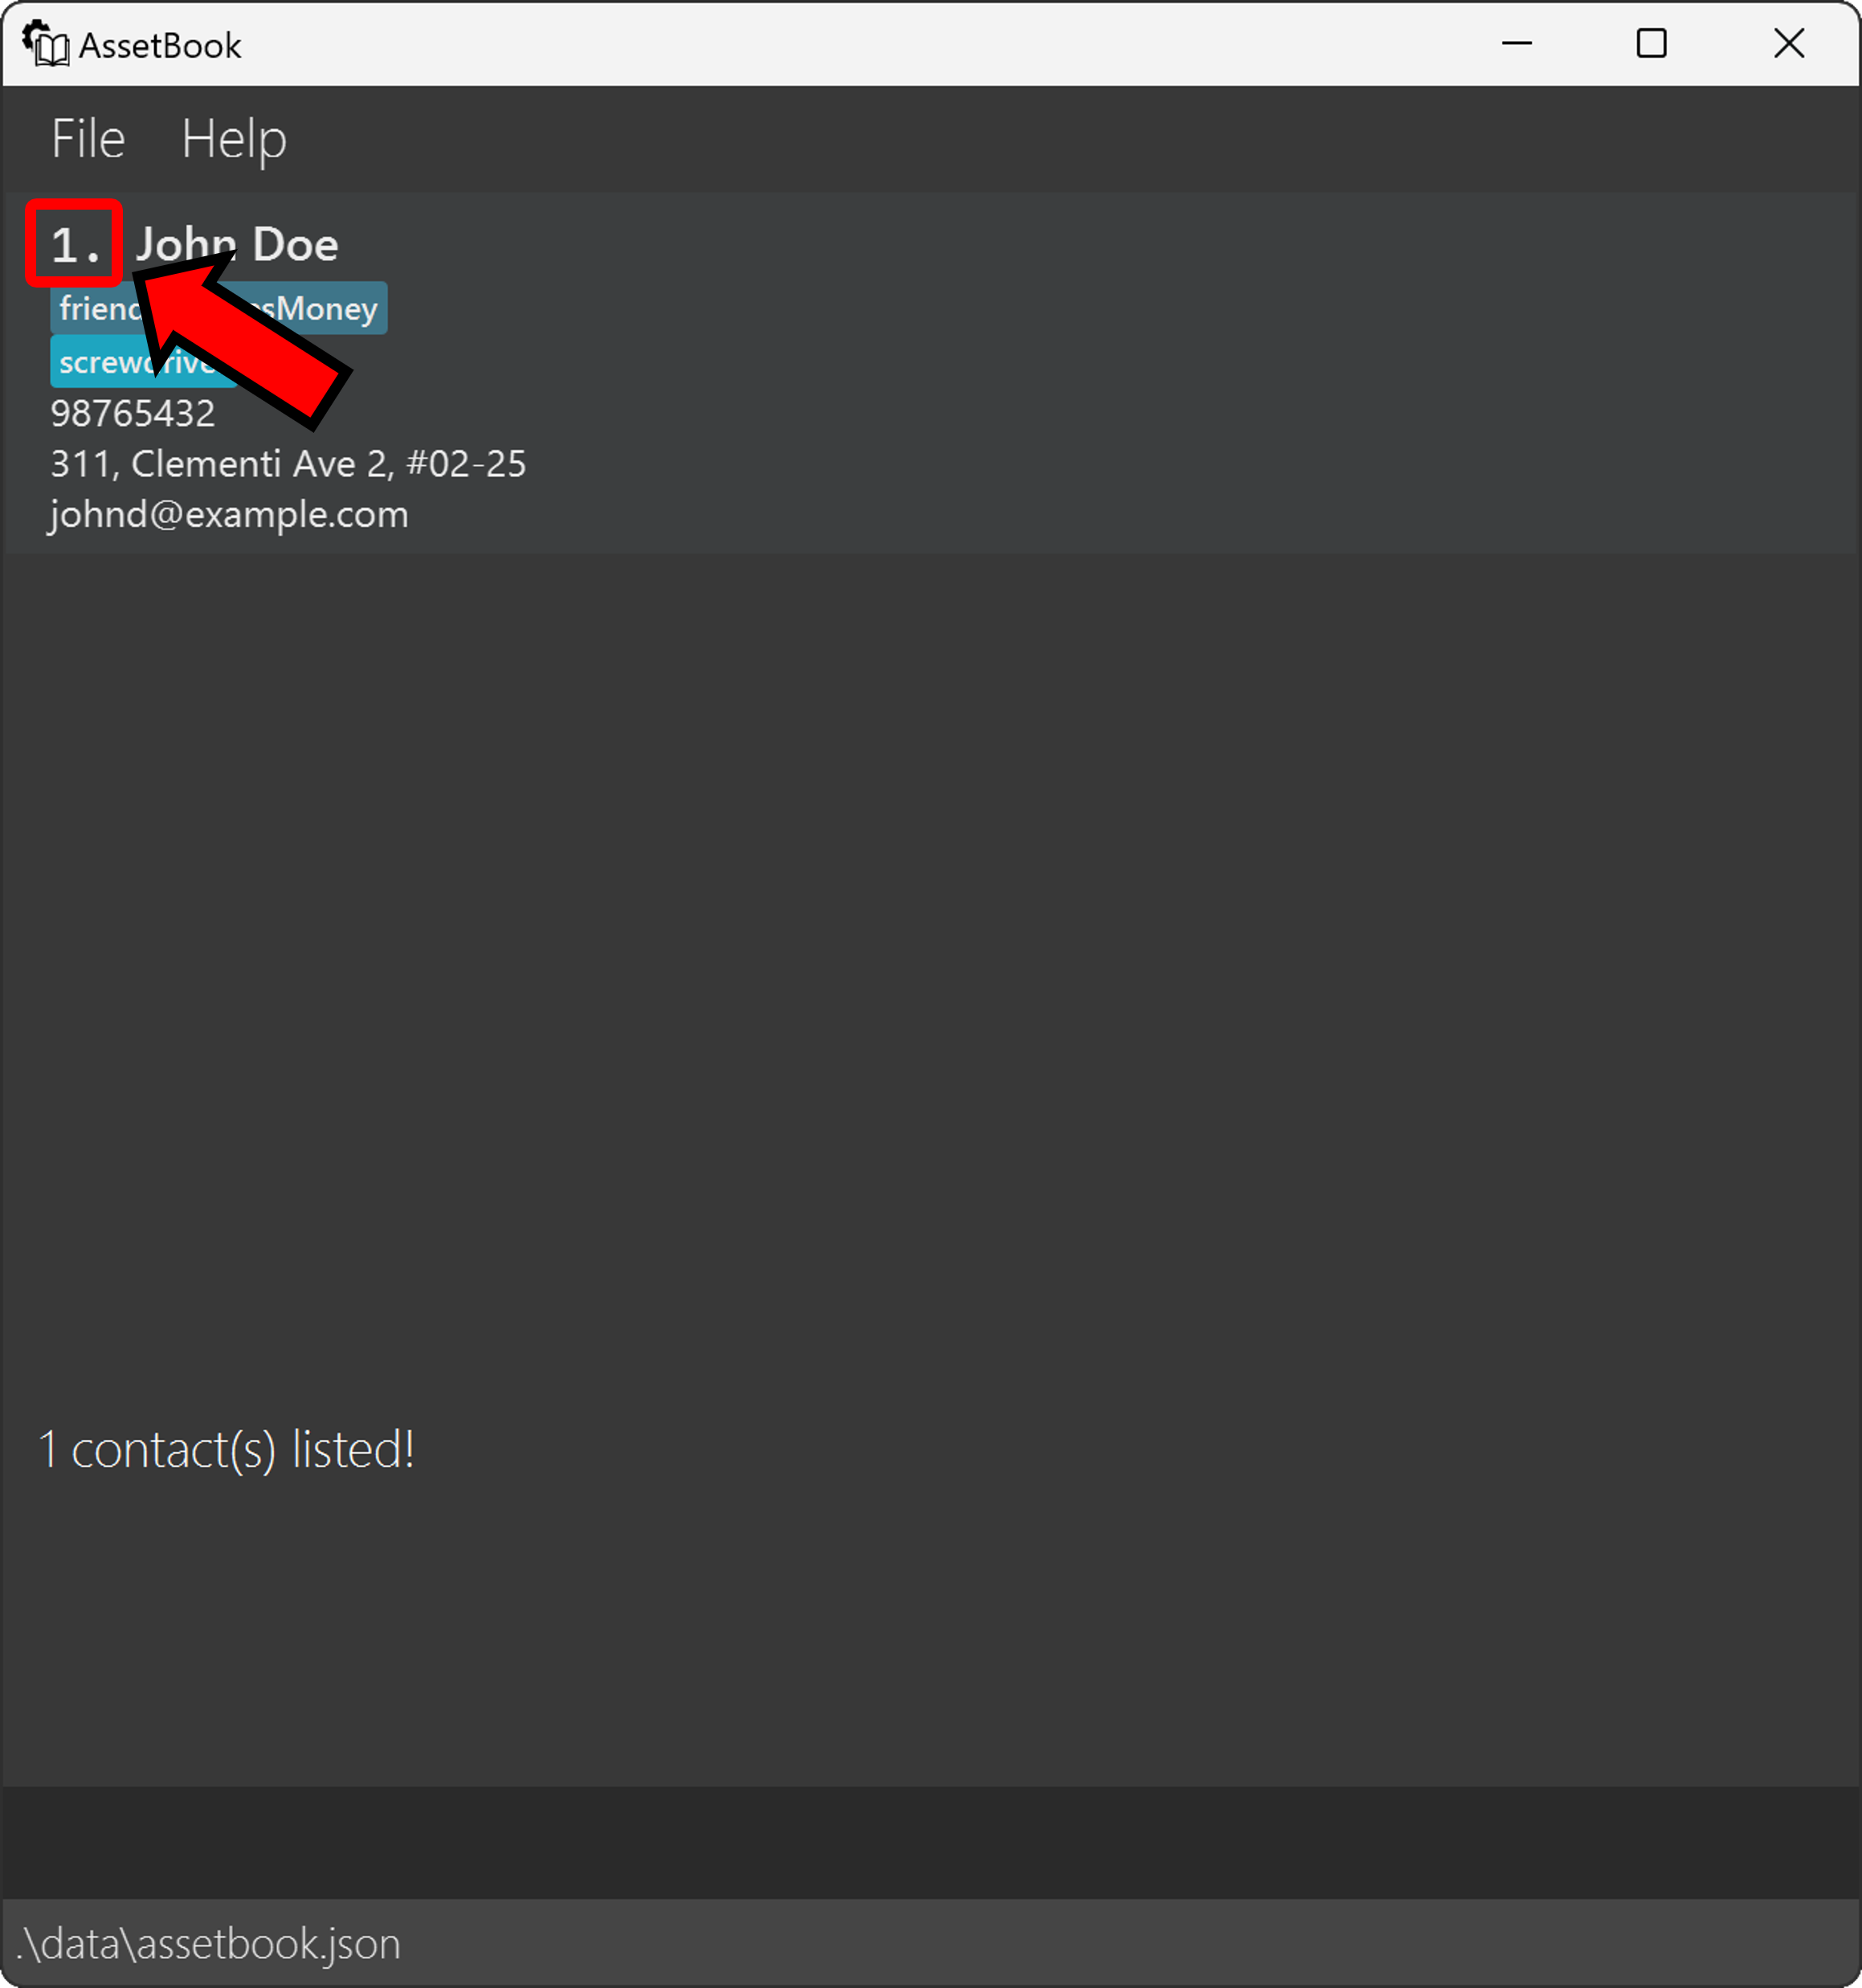
The index each contact has changes when you use the find command.
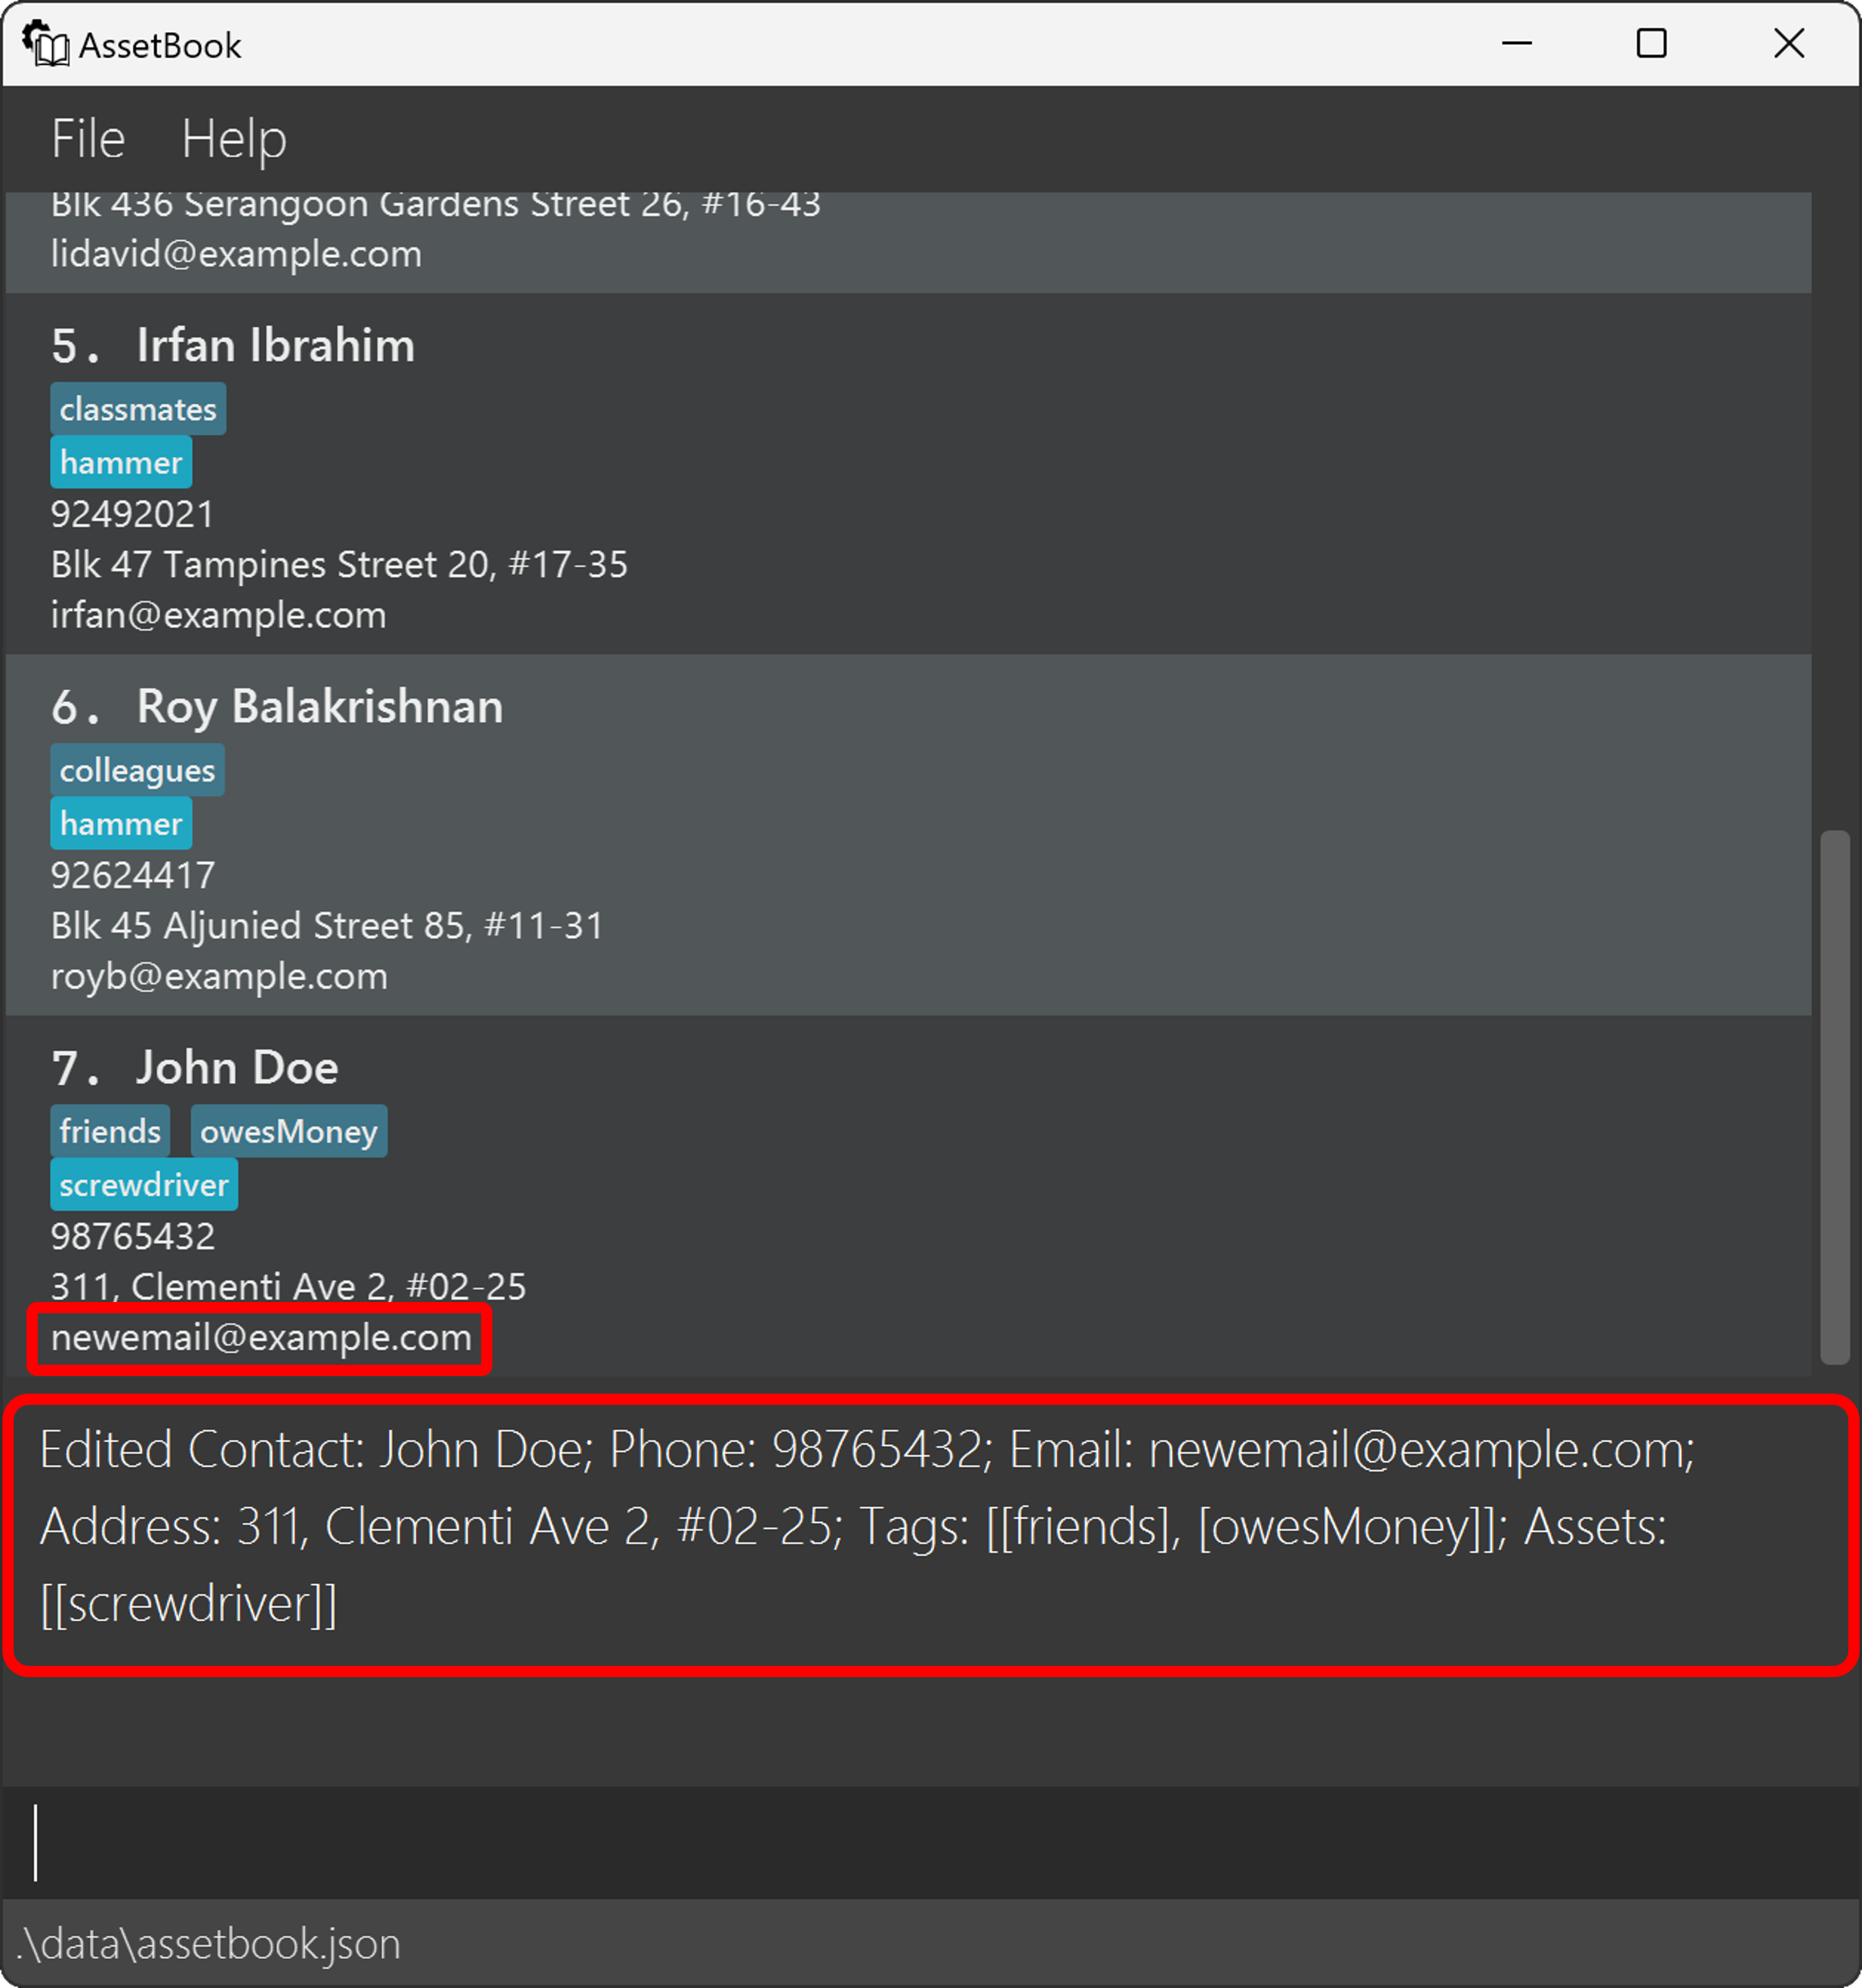
- Enter the Edit Command:
We can edit John's email by typing the following command:
edit 1 e\newemail@example.com
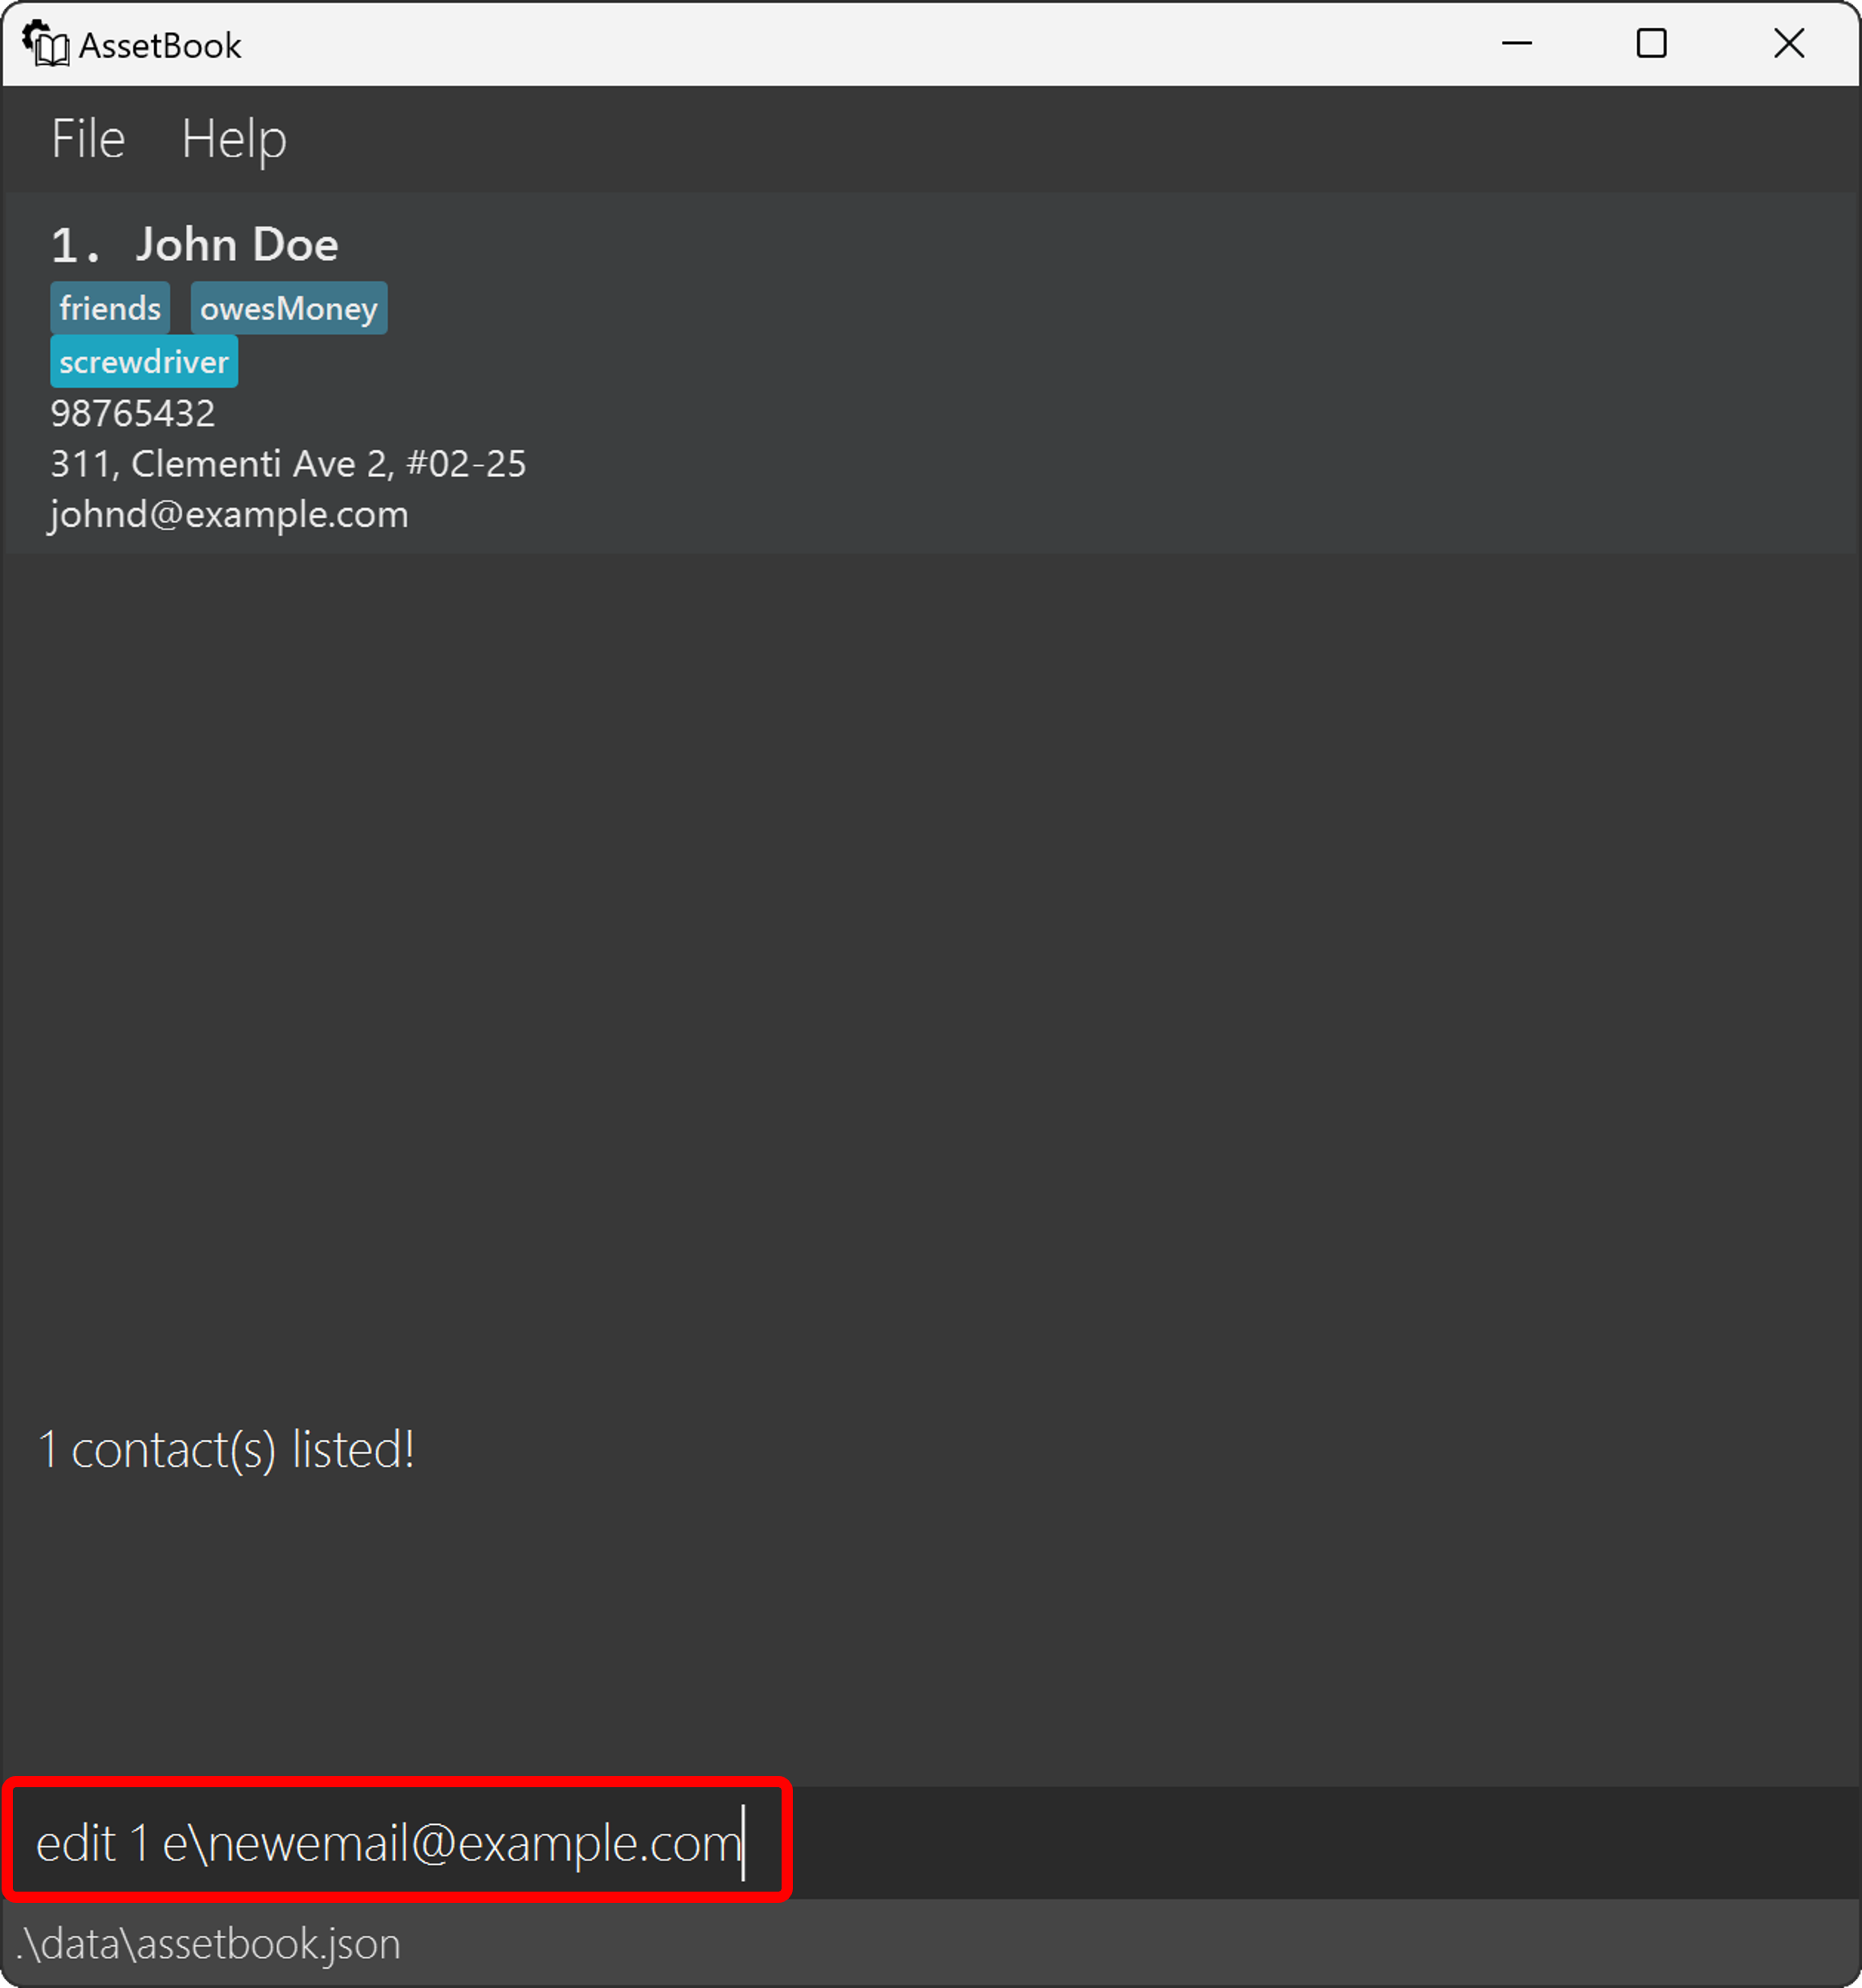
- Execute the Command:
Press
Enterafter typing in the command. This will update John's email address.
- Confirmation: Look for a confirmation message, indicating that John's email has been successfully updated.
Editing Assets
Let's update our existing assets.
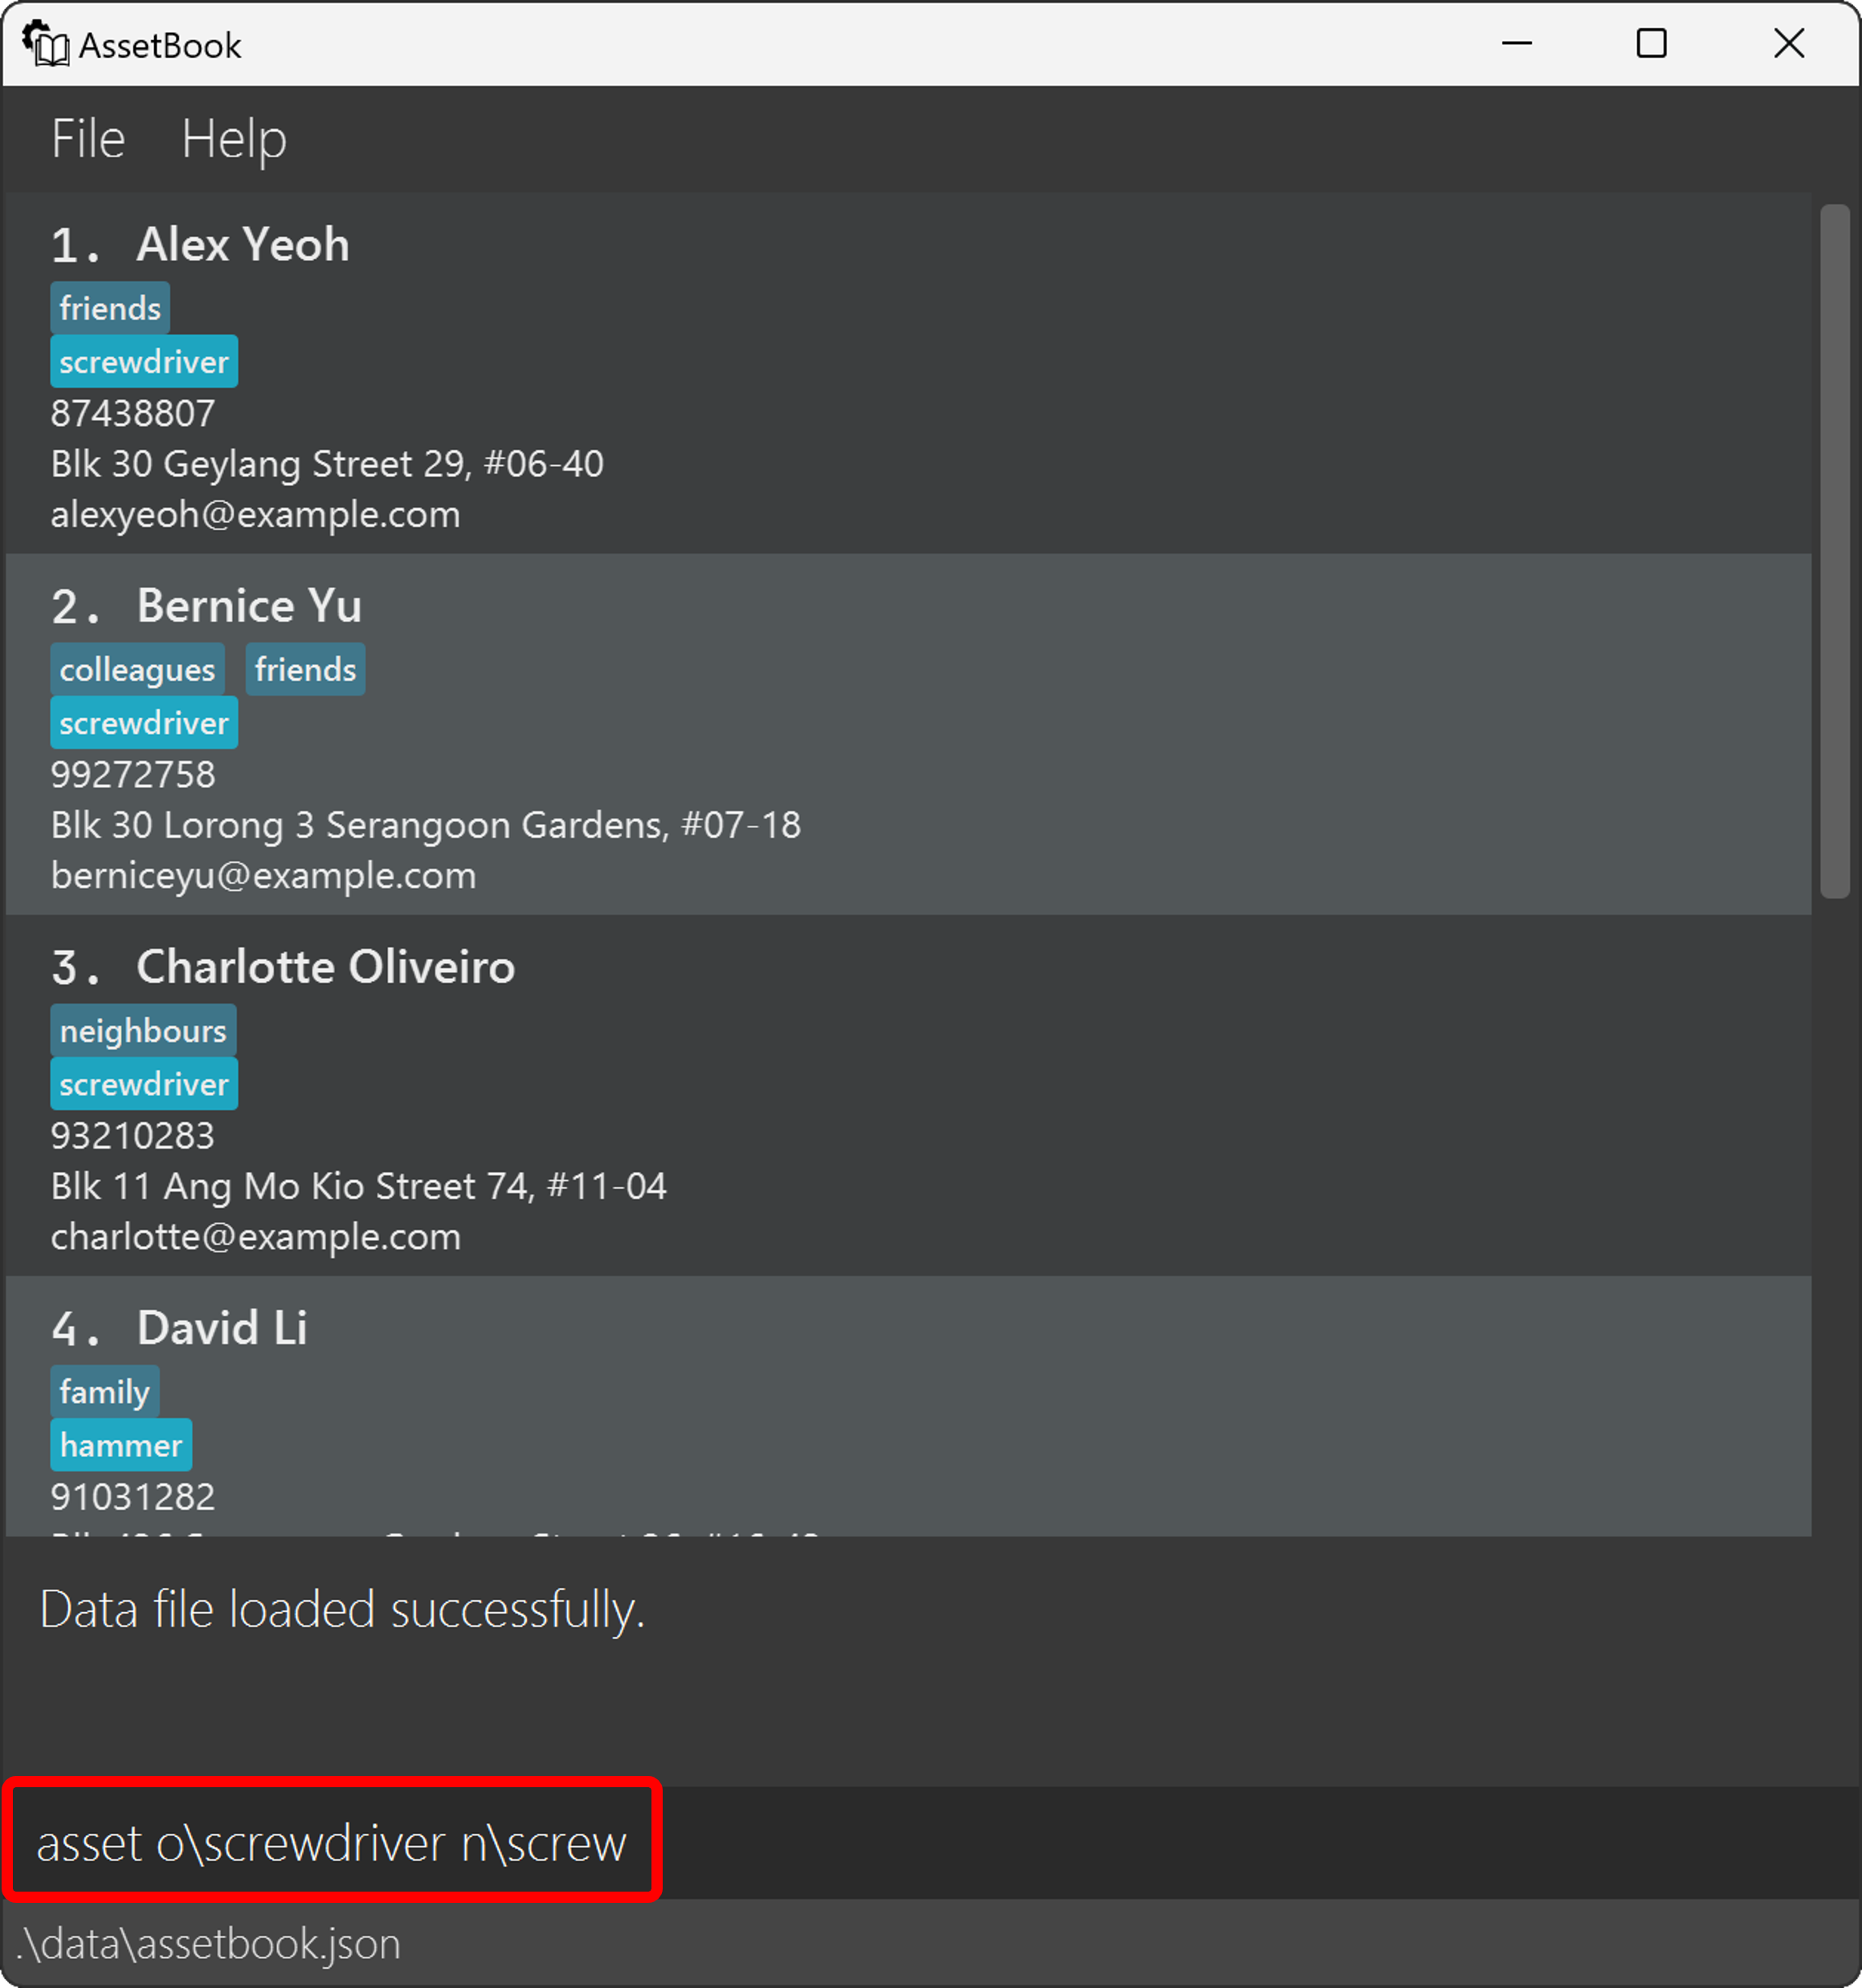
Click on the Command Input Box: Start by clicking on the command input box.
Enter the Edit Asset Command: We can change all assets with the name "screwdriver" to "screw" using the following command:
asset o\screwdriver n\screw
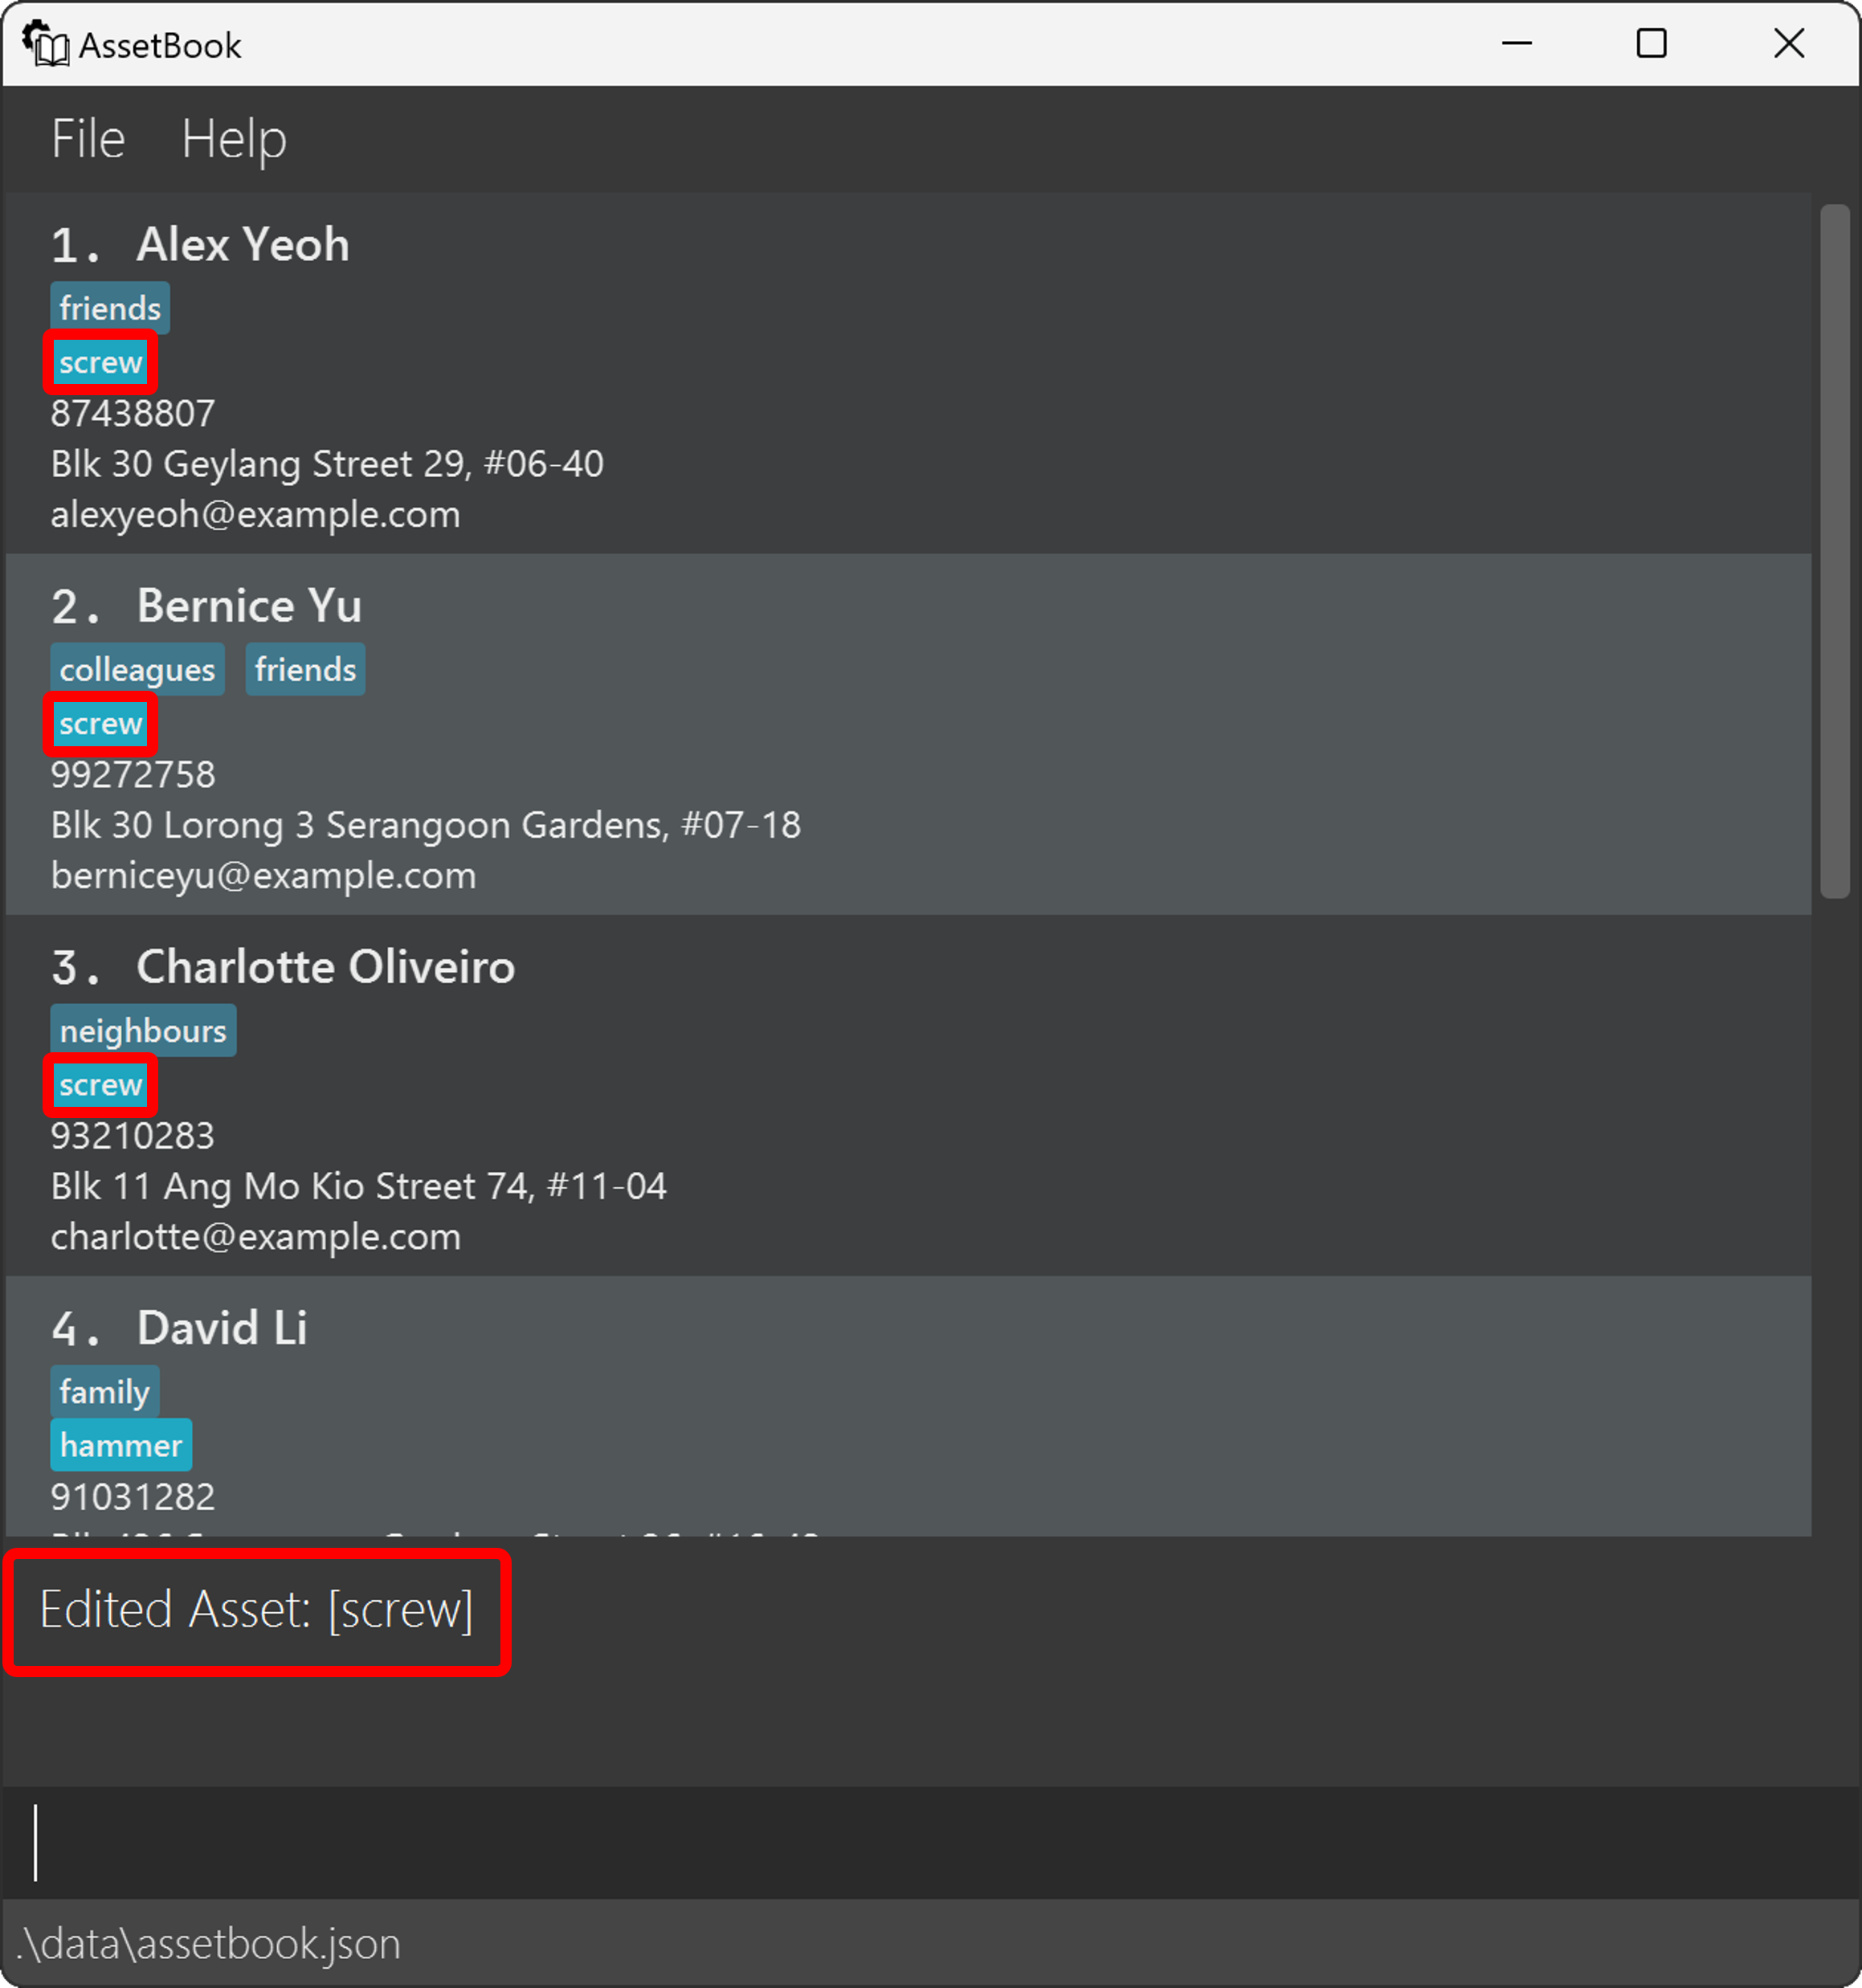
- Execute the Command:
After entering the command, press
Enter. This will update the asset details in AssetBook.
- Confirmation: Check for a confirmation message to ensure that the asset has been successfully updated.
Features
This section documents all the features of AssetBook in detail.
Most features of AssetBook come in the form of commands, which are specific text inputs that the user enters into the application. Features fall into two broad categories: those that allow the user to modify contact data, and those that are miscellaneous shortcuts for convenience.
Colored text that look like the following describe the format of a command.
add n\NAME p\PHONE e\EMAIL a\ADDRESS [t\TAG]... [A\ASSET]...
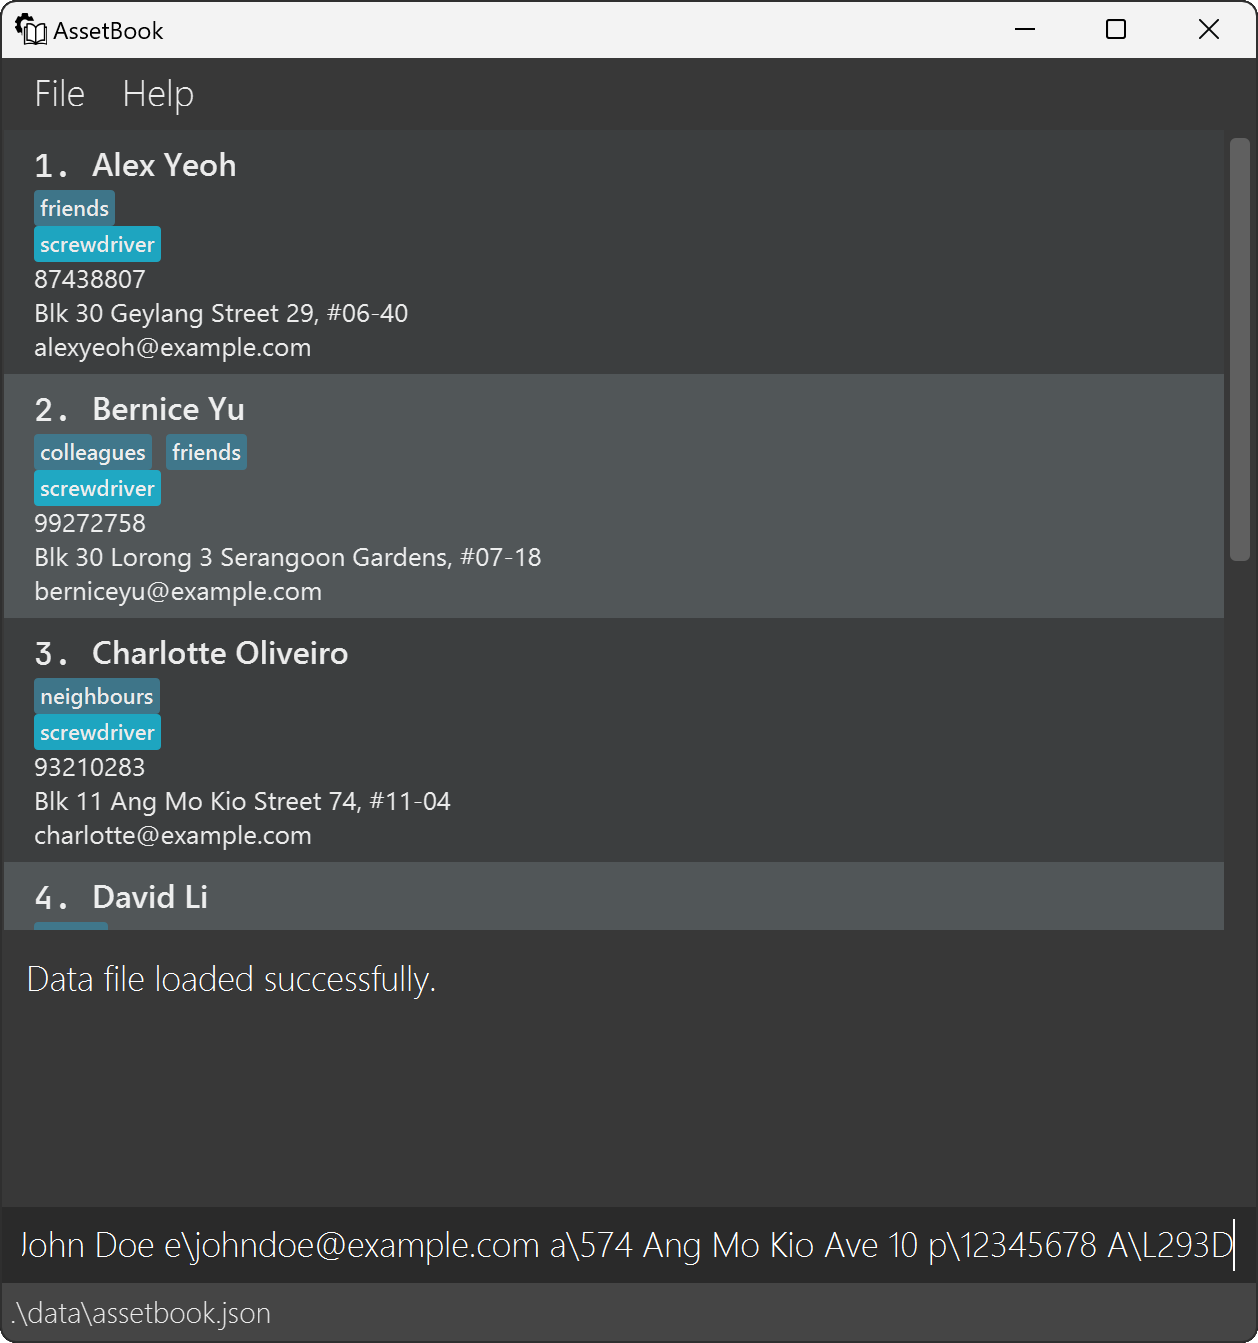
A valid input by the user corresponding to the above will be
add n\John Doe e\johndoe@example.com a\574 Ang Mo Kio Ave 10 p\12345678 A\L293D
Command words are not case-sensitive, i.e. add, Add, ADD, etc. are all valid.
Notes about the notation used to describe commands
Here,
addis the command word, signifying that this adds a new contact to the list of contacts.Parameters have the format
PREFIX\FIELD.
e.g.n\,p\,e\are prefixes.John Doe,98765432,johnd@example.comare respective examples of fields.Text that are capitalized like
NAMEare descriptions of what kind of text the field should be.
e.g. Forn\NAME,n\John Doeshould be entered in its place.Items in square brackets are optional.
e.g. Forn\NAME [t\TAG], bothn\John Doe t\friendandn\John Doeare valid.Items followed by
...indicates that it can be entered multiple times.
e.g. For[t\TAG]..., botht\friendandt\friend t\colleagueare valid.Parameters can be in any order.
e.g. if the command specifiesn\NAME p\PHONE,p\PHONE n\NAMEis also valid.Parameters entered by the user but not specified by the command format will be ignored.
e.g. The format isexit, but the user entersexit 123. This will still be interpreted asexit.
After successful execution of a command, some feedback will appear in the command output box. If you enter something that the application did not expect or does not understand, an error message will show up instead.
If you are using a PDF version of this document, be careful when you copy and paste commands that span multiple lines, as space characters may be missing when copied over to the application.
Note that the backslash \ is reserved for prefixes. It is not allowed to be part of any field.
Modifying Commands
This section contains the details for modifying commands, which add, edit or delete data in AssetBook.
Adding a Contact: add
Adds a new contact.
Format: add n\NAME p\PHONE e\EMAIL a\ADDRESS [t\TAG]... [A\ASSET]...
A contact can have any number of tags and assets (including 0).
Example
- Add a new contact associated with the asset
L293D:
add n\John Doe e\johndoe@example.com a\574 Ang Mo Kio Ave 10 p\12345678 A\L293D
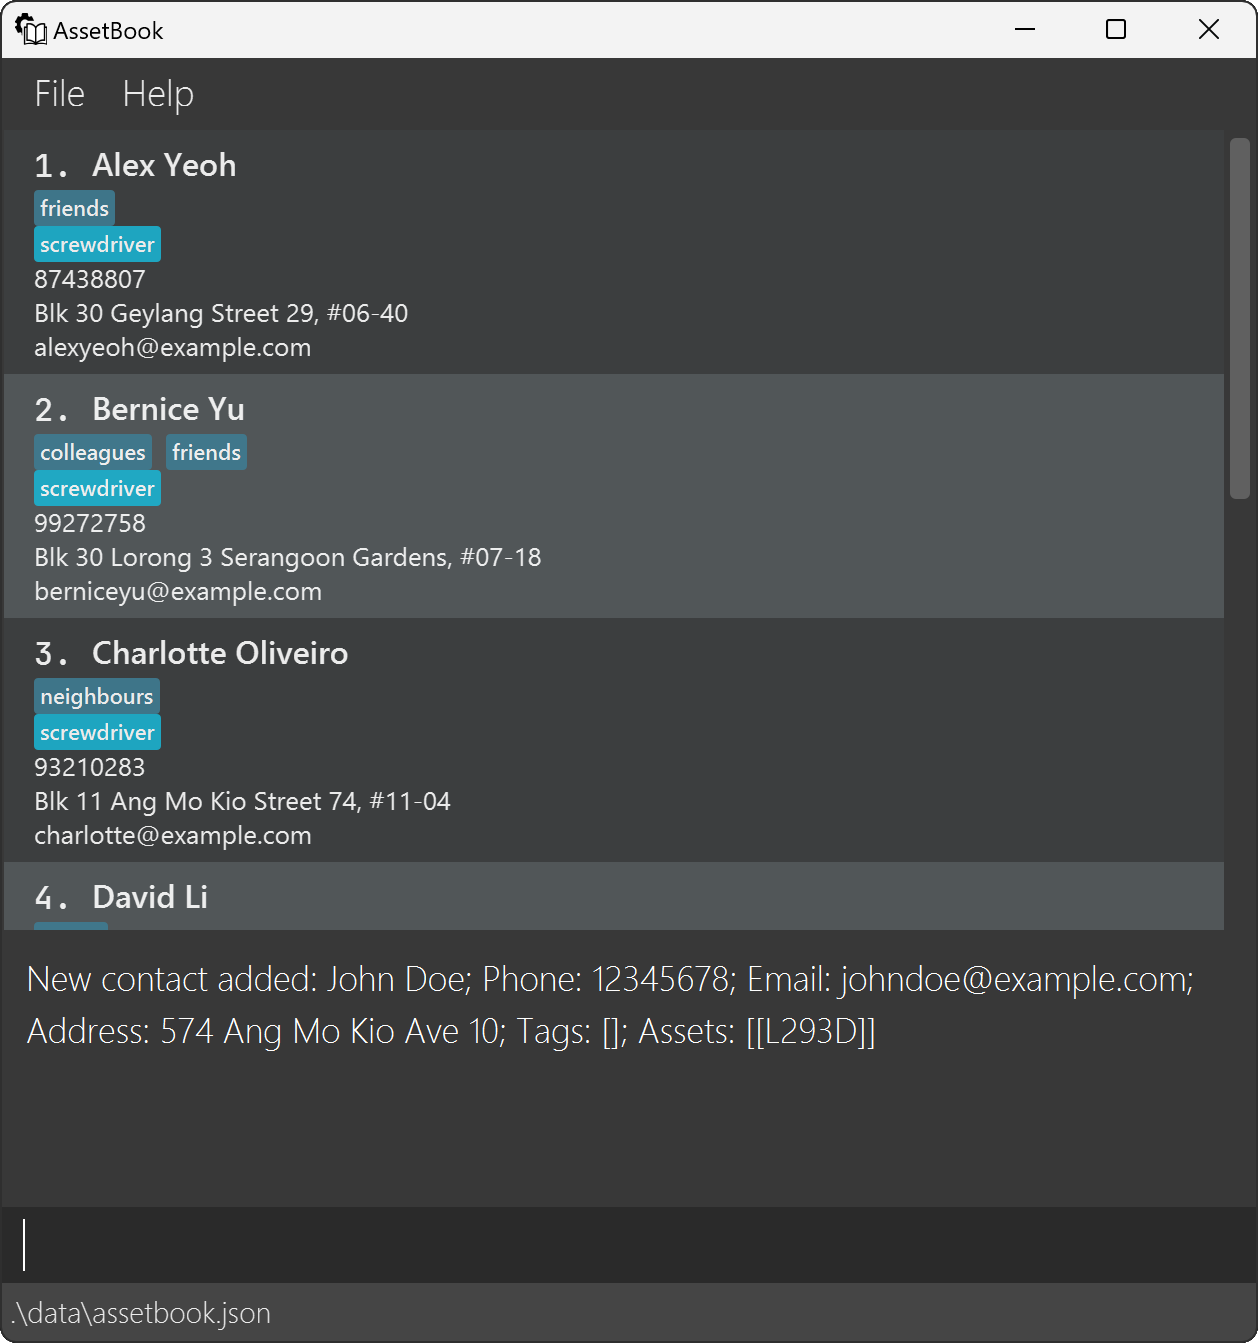
Success
If the command was executed successfully, the following message will appear:
New contact added: John Doe; Phone: 12345678; Email: johndoe@example.com; Address: 574 Ang Mo Kio Ave 10; Tags: []; Assets: [[L293D]]
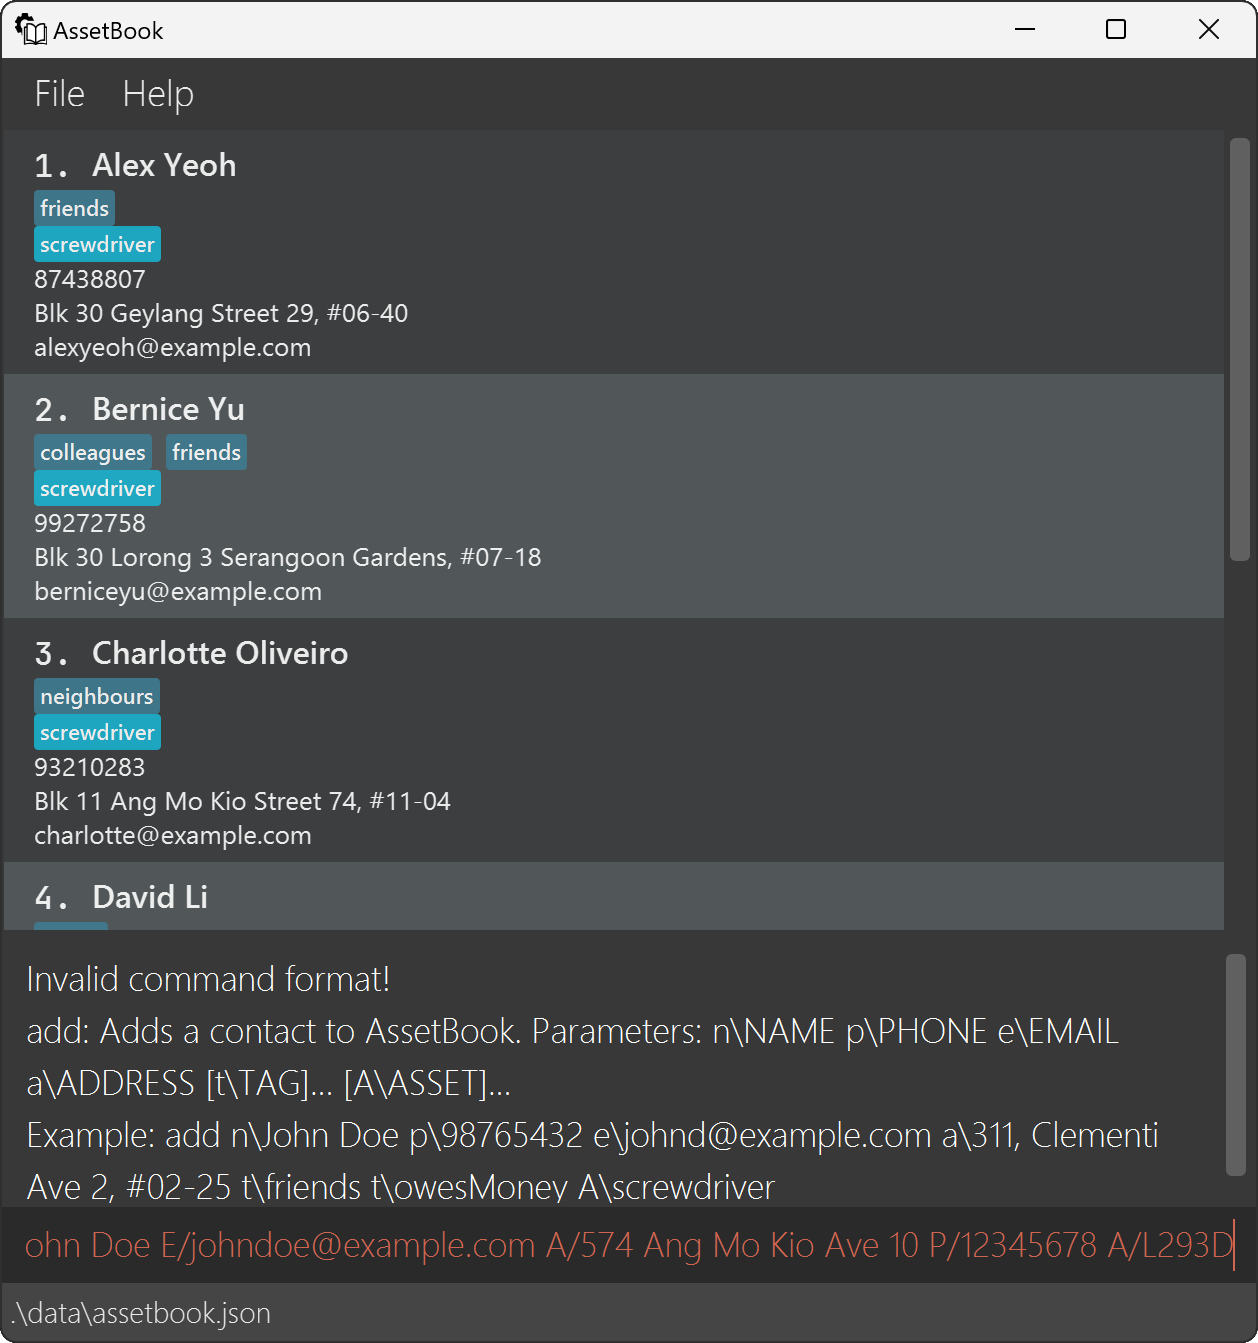
Failure
If the command was not executed successfully, the proper format of the add command will be shown to you instead.
Fields
NAME
- Name of the contact.
- Case sensitive, i.e.
john doeis not the same asJohn Doe. - Leading and trailing spaces are automatically removed.
- Multiple people with the same name are not allowed.
PHONE
- Phone number of the contact.
- Only digits, '+', '-', ',' and spaces are allowed.
- The phone number must contain at least 3 characters.
- Example:
+65-8765-4321, +97 6223 5555is allowed.
EMAIL
- Email of the contact.
- Must be of the format
local-part@domain-namewith the following constraints:local-partconsists of alphanumeric characters that may be separated with any one of these special characters:+_.-.local-partshould not start or end with any special character.- This is followed by
@and then adomain name.domain-nameis made up of 1 or moredomain-labelsseparated with a period. domain-labelsmust:- start and end with alphanumeric characters
- consist of alphanumeric characters, that may be separated with a single hyphen.
- The last
domain-labelmust be at least 2 characters long.
ADDRESS
- Address of the contact.
TAG
- Tag(s) to categorize the contact into.
- Only digits and alphabets are allowed.
ASSET
- Asset(s) associated with contact.
- Contact may be created first without assets, then have assets added later using the
editcommand. - Case sensitive, i.e.
NUSis not the same asnus. - Multiple assets can be specified at once. For example, a valid option is
A\asset1 A\asset2 A\asset3.
You may assign the same asset to multiple contacts, so remember to name different assets with unique names.
Deleting a Contact: delete
Delete a contact by specifying its index.
Format: delete INDEX
Example
delete 1 deletes the contact at index 1.
INDEXrefers to the unique contact index shown beside the contact names.
Editing a Contact: edit
Edit existing contacts without recreating them.
Format: edit INDEX [n\NAME] [p\PHONE] [e\EMAIL] [a\ADDRESS] [t\TAG]... [A\ASSET]...
Example
edit 1 e\newemail@example.com edits the contact with index 1, changing its email to newemail@example.com.
- Edits the contact at the specified
INDEX.INDEXrefers to the unique contact index shown in the GUI. - At least one of the optional parameters must be provided.
- Existing fields will be changed to the inputted fields.
- You can remove all tags associated to the contact by typing
t\without specifying any tags after it. - You can remove all assets associated to the contact by typing
A\without specifying any assets after it.
Edit replaces the current tags and assets of a contact. It does not add on to existing tags and assets.
Editing an Asset: asset
Edit existing assets without recreating them.
Format: asset o\OLD_ASSET_NAME n\NEW_ASSET_NAME
Example
asset o\hammer n\screwdriver edits the asset hammer, changing its name to screwdriver.
o\refers to the old asset name, whilen\refers to the new asset name.- The asset will be renamed for all contacts that have it.
Clear all Contacts: clear
Deletes all contacts.
Format: clear
If you unintentionally deleted all your contacts, you can use the undo command to bring them back.
Miscellaneous Shortcuts
This section contains the details for non-modifying commands and other useful shortcuts.
Finding Contacts: find
Finds contacts by name, tag or asset.
Format: find QUERY
Example
Find contacts whose name, tags, or assets contain jo:
find jo
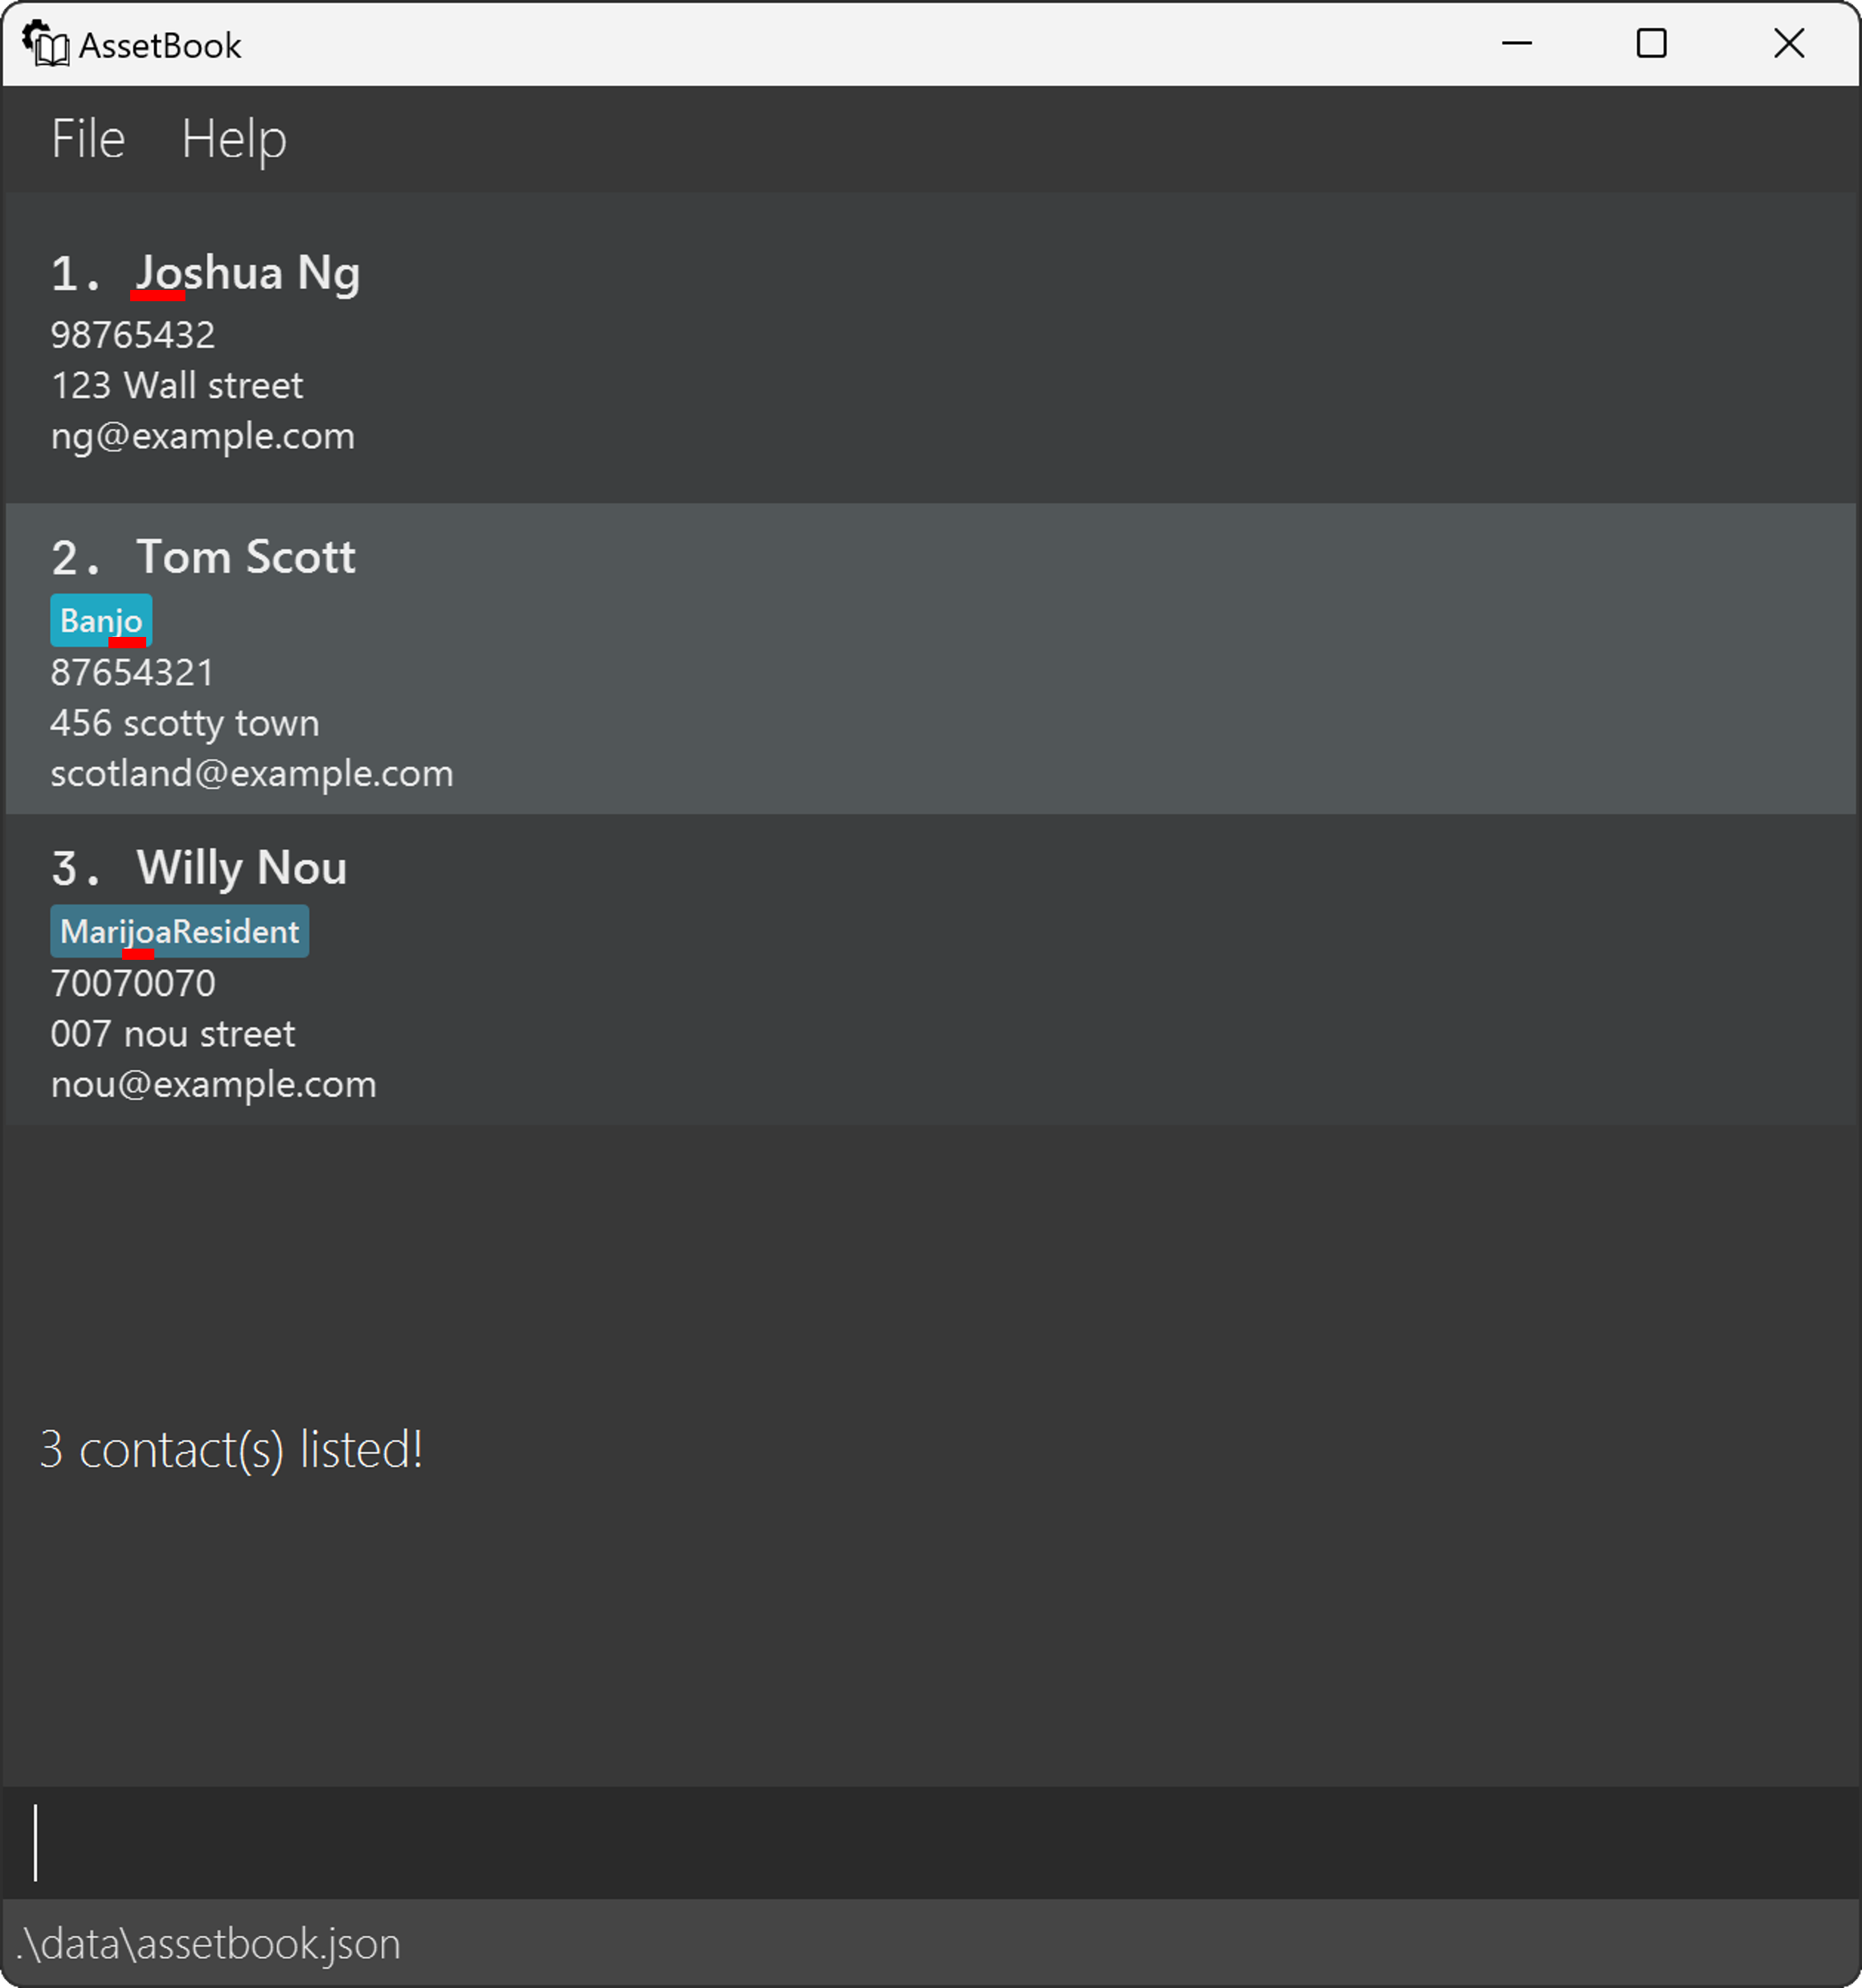
3 matches were found, each with jo found in a different field and at different positions.
- The query is case-insensitive.
- Spaces in both query and fields will be ignored.
- Each field is individually checked against the query.
- A match is found if the field contains the entire query, i.e. the field
assetscontainsset, but does not containsettings.
Listing all Contacts: list
Displays all contacts.
Format: list
- Useful when you have filtered the contacts list with
find.
Undoing Commands: undo
Undoes the last modifying command.
Format: undo
Example
After incorrectly deleting the first contact with delete 1, it can be restored with undo.
- Modifying commands include:
add,delete,edit,asset,clear. - All other commands are non-modifying.
Redoing Commands: redo
Reverses the latest undo command.
Format: redo
Example
If an asset name was changed, after undo was executed to verify what the previous asset name was, redo can be used to revert to the new asset name.
After executing an undo command, you cannot redo this if another modifying command was executed.
Display Previous Commands: ↑ and ↓
Displays previously executed commands, which can then be edited and executed again.
Press the ↑ arrow key to show older commands.
Press the ↓ arrow key to show newer commands.
Only successfully executed commands will be shown.
Copying a Field from a Contact: copy
Copies a specific field to your clipboard, which you can paste elsewhere.
Format: copy INDEX PREFIX
INDEXrefers to the unique contact index shown in the GUI.
Example
copy 1 p\ copies the phone number of the contact with index 1 onto the clipboard.
Prefix Reference
| Prefix | Field |
|---|---|
n\ | Name |
p\ | Phone |
e\ | |
a\ | Address |
t\ | Tags |
A\ | Assets |
Getting Help: help
Displays a link to this user guide.
Format: help
Exiting the Application: exit
Exits the application. Equivalent to pressing X on the top right corner on Windows, and top left corner on MacOS.
Format: exit
Saving the data file
AssetBook's data is saved automatically after any command that changes the data. There is no need to save manually.
Editing the data file
AssetBook's data are saved automatically as a JSON file [JAR file location]/data/assetbook.json.
Advanced users are welcome to update data directly by editing that data file.
Caution: Editing the JSON file directly is a feature meant only for advanced users. If you edit the JSON file, it is your responsibility to ensure that the edits are valid. If the JSON file is invalid, a warning message will be shown when AssetBook is launched.
Frequently Asked Questions
Q: My device is running MacOS, and the text is not displaying correctly. What should I do?
A: Try installing this Java 11 version instead.
Q: My device is running MacOS, and I am unable to open assetbook.jar by double-clicking. What should I do?
A: Hold Ctrl and click on assetbook.jar. Select 'Open', and then 'Open' again to start the application.
Q: My device is running Linux, and I am unable to open assetbook.jar by double-clicking. What should I do?
A: Open the terminal, enter java -jar path/to/assetbook.jar, replacing path/to with the location where assetbook.jar is saved.
Q: My device is running an operating system that is not Windows, MacOS or Linux. Can I use AssetBook?
A: AssetBook may work on your device, but it is not guaranteed to work. If there is high demand, we may start supporting other operating systems!
Q: Do I have to use Java 11 specifically?
A: While it may work with other versions of Java, AssetBook is developed specifically for Java 11. We cannot guarantee that it works on versions other than Java 11.
Q: How do I transfer my data to a new device?
A: Set up AssetBook on the new device and copy the data folder from the old device to the new device. Ensure that the data folder is located in the same folder as assetbook.jar.
Known Issues and Future Features
Multiple Screens
When using multiple screens, if you move the application to a secondary screen, and later switch to using only the primary screen, the GUI will open off-screen.
The remedy is to delete the preferences.json file created by the application before running the application again.
Name Validation
At present, names allow any special character except \. This is to allow the user flexibility to include uncommon names
that may include symbols such as /, ' and -. As such, the application may accept all manner of gibberish for names.
A remedy is planned for the future to perform more robust checks on names.
More Asset Details
Some users may require assets to have more details recorded. We plan to add features that allow adding of more fields to assets such as serial number, location, etc.
Command Summary
| Command | Format | Example |
|---|---|---|
| Add | add n\NAME p\PHONE e\EMAIL a\ADDRESS [t\TAG]... [A\ASSET]... | add n\John Doe e\johndoe@example.com p\+12345678 A\L293D |
| Delete | delete INDEX | delete 1 |
| Edit contact | edit INDEX [n\NAME] [p\PHONE] [e\EMAIL] [a\ADDRESS] [t\TAG]... [A\ASSET]... | edit 1 e\newemail@example.com |
| Edit asset | asset o\OLD_ASSET_NAME n\NEW_ASSET_NAME | asset o\hammer n\screwdriver |
| Clear | clear | clear |
| List | list | list |
| Find | find QUERY | find John |
| Undo | undo | undo |
| Redo | redo | redo |
| Copy | copy INDEX PREFIX | copy 1 p\ |
| Help | help | help |
| Exit | exit | exit |
Glossary
Alphanumeric
Consists of only letters and numbers.
Asset
An item or amenity of logistical significance.
Character
A single letter, number, or symbol. Examples: a, 1, &, -.
Clipboard
A place where text is stored in the computer, and can be typically retrieved with right click -> paste, Ctrl+V, or Command+V.
Command
A specific text input entered into the command input box to interact with AssetBook.
Field
A detail that is part of a parameter, and is after the prefix. For example, NAME is a field of the n\NAME parameter.
GUI
Graphical User Interface. The window that appears when an application is launched.
Operating System
Windows, MacOS and Linux are examples of operating systems.
Parameter
A detail that a command expects to be entered by the user. For example, n\NAME is a parameter of the add command.
Prefix
A detail that is part of a parameter, and is before the field. For example, n\ is a prefix of the n\NAME parameter.